
So, how to spoke a wheel? To an experienced wheel builder this should be a common procedure, yet almost a fundamental skill, but to a beginner it can be a moderate challenge at minimum. This will be a step by step guide on how to lace a wheel.
I remember when I was lacing my first wheel, where the rim was bent and needed to be replaced. Everything looked very logical at first glance… right up to the point when I had to start rebuilding the wheel on my own from scratch. Where to put the first spoke, how to do spoking around the valve hole, how to deal with the cross lacing patterns?
And since my previous articles are mainly oriented on truing or tensioning the wheel, I thought it would be nice to have a detailed step by step guide or tutorial on how to lace a wheel in the first place.
This article persumes you have all the components for your build ready. If you are not sure how to take hub and rim measurements, read my article on taking measurements for wheelbuilding and then fill all these measurements into a spoke calculator to get the correct spoke length.
But let's first clear up some terminology used in this article, so you will be able to follow along this how-to guide later on with ease.
Spoke groups
Being organized is the thing! For traditional wheels, we could sort spokes into four groups – half of them go to the right hub flange, meaning they are drive side spokes, the other half to the left hub flange, also named non-drive side spokes. From there, half spokes (one quarter of them total) will usually be heads in and the rest of them heads out.
You will only be fitting spokes of one group at a time and in that manner, lacing a wheel will be a 4-step procedure. When one group of spokes is inserted, turn the wheel around and continue with a group that is intended for the opposite hub flange.
Note: when dealing with exotic lacing patterns (for example 2:1) or odd spoke count, you will have to adjust that logic accordingly, but the main principles and good practices stay the same.
Heads out, heads in spokes
Spokes that you insert into the wheel hub flange so that they point to the center of the hub will be heads out spokes as they have their heads on the outside part of the hub flange while spoke body is leaning on the inside of the flange.
And other way around, spokes that you will fit through the wheel’s hub flange and will be pointing towards the locknuts will be heads in as their heads will sit on the inside part of the hub flange while their body is leaning on the outside part of the flange.
Most wheel hub flanges have holes drilled conically (at an angle) to provide a better sitting place for the spoke’s head and allow maximum contact point between the spoke and the flange. Take caution if such angled holes drillings are alternating, as they indicate where spokes should be pointing.
But, do you always fit spokes in the flange in an alternating manner where half of them are heads in and the other half heads out? No, not necessarily. However, for crossing patterns this is in fact necessary, to even allow the first cross of the spokes at the hub flange. On the other hand, a radial spoking pattern (shown in appendix) is generally done with all spokes heads out. Mostly because of aesthetics.
Trailing and leading spokes
On each flange, half are "trailing" spokes and half are "leading" spokes. If you imagine typical motion of the wheel and direction of turning, leading spokes will be the ones that “push” the wheel forward when you turn your pedals.
Trailing spokes on the other hand as the name suggests follow leading spokes and are actually “pulling” the wheel forward then you crank up force on the hub.

Tension wise, ignoring the fact that wheel’s under load, leading spokes should compress on wheel’s turn when power is added to the hub while trailing spokes stretch and contribute more at higher driving torque. You can read more about spoke tension in general and how it dynamically changes in every phase of the wheel turn in my other article: Spoke tension - The definitive guide to spoke tensioning.
According to opinion of some of masterminds in this area, take Sheldon Brown's article about wheelbuilding for example, for a wheel to be durable and strong, all trailing spokes should be heads out, while leading spokes should be heads in. Such practice should guarantee increased stiffness and durability of the wheel.
LACING A WHEEL
Lacing is a procedure of fitting spokes when building a bicycle wheel, when they are passed through wheel hub holes and then threaded onto the nipples in the rim. Lacing is mostly done sitting while holding a rim on the edge in your lap. A wheel builder then slowly rotates the wheel and turns it around while fitting the spokes.

Of course, there are some very specific tools that will make your work easier. Check my other article about how you can make a wheel building stand – a tool that should enable you a hands-free spoking of a wheel.
Spoke lacing patterns
In the figure below, there are 4 commonly used lacing patterns and knowing their advantages or limitations will help you choose the right one for the job. Spoke lacing patterns are named based on how many times a spoke “crosses” other spokes from the same flange on its way from the hub to the rim. For example, in 3 cross lacing pattern, a spoke crosses over twice then under once.

In radial lacing pattern, spokes go directly from the hub to the rim hole. It is easy to understand, lacing is done much faster and wheels with such pattern look cool. Radial spoking also offers aerodynamic gains and weight savings because spokes are a bit shorter. However, beware as radial lacing should only be used on front non-disc brakes wheels because of its limitations. The main being that it doesn’t completely allow for braking power and driving force to be transferred from the hub to the rim and at the same time it produces higher outward stress on the hub flange.
On the other hand, one, two and three cross lacing patterns are semi-tangential, as spokes do not run from the hub directly to the rim, but more like a tangent. In that way these lacing patterns stress the hub a little less outwards, and provide a better transfer of braking power or drive torque between the hub and the rim and an overall resistance to the abuse. In that way cross number is a good indicator of wheel strength. You can read more about lacing patterns in the article by Purecycles.
The key spoke
Knowing where to start lacing a wheel is crucial. The first spoke inserted into hub flange is normally called the key spoke. Its position matters as it determines the position of all the other spokes with respect to the valve hole.
But how to know where even start lacing a wheel? Knowing everything that was written, and good practices below, you should be able to figure it out quickly.
Good practices of lacing a wheel
Before we start with this guide, you should read over some good practices of spoking a wheel:
- Start spoking the wheel with spokes on the drive side, lacing one group of spokes at a time, then alternating to the non-drive side and returning back afterwards.
- Always check if the rim is angle-drilled. Deep section carbon road rims in particular have holes drilled at an angle that a nipple is properly seated to point toward the flange. The same goes for the hub flange drillings.
- Spokes shouldn’t cross the valve section. When the wheel is properly laced, the valve should be easily accessible for pumping the tire.
- Always try to first fit the two spokes groups that will be heads out. In other case inserting spokes through hub flange on the inside makes it very hard to lace a wheel.
- Once the wheel is laced, adjust all of the nipples so that each is screwed equally far onto its spoke. This will make it far easier for truing the wheel later on.
Before we start
So, let’s get to the actual step by step guide. Continue reading if you want to learn how to spoke a wheel.
For the purpose of this article I will demonstrate spoking a wheel with 24 classic J-bend spokes, using 2 cross lacing pattern on drive and non-drive side as well. This example is a common lacing process of a road rim brake rim. And also, rear hub’s freehub graphic will clearly give you an indication in which direction does the wheel turn.
As for different cross numbers,the instructions are based on a normal 2 cross pattern, but the logic behind the process stays intact.
HOW TO SPOKE A WHEEL – 1st way
In the first way, I am showing my own typical way of spoking a wheel. The key spoke will be a leading spoke, positioned in the first hole counter clockwise from the valve. It is a more intuitive procedure than the one when you start with a trailing spoke, you’ll see. Continue to the 2nd way of spoking a wheel, if you want leading spokes to be heads in as Sheldon Brown’s article persist.
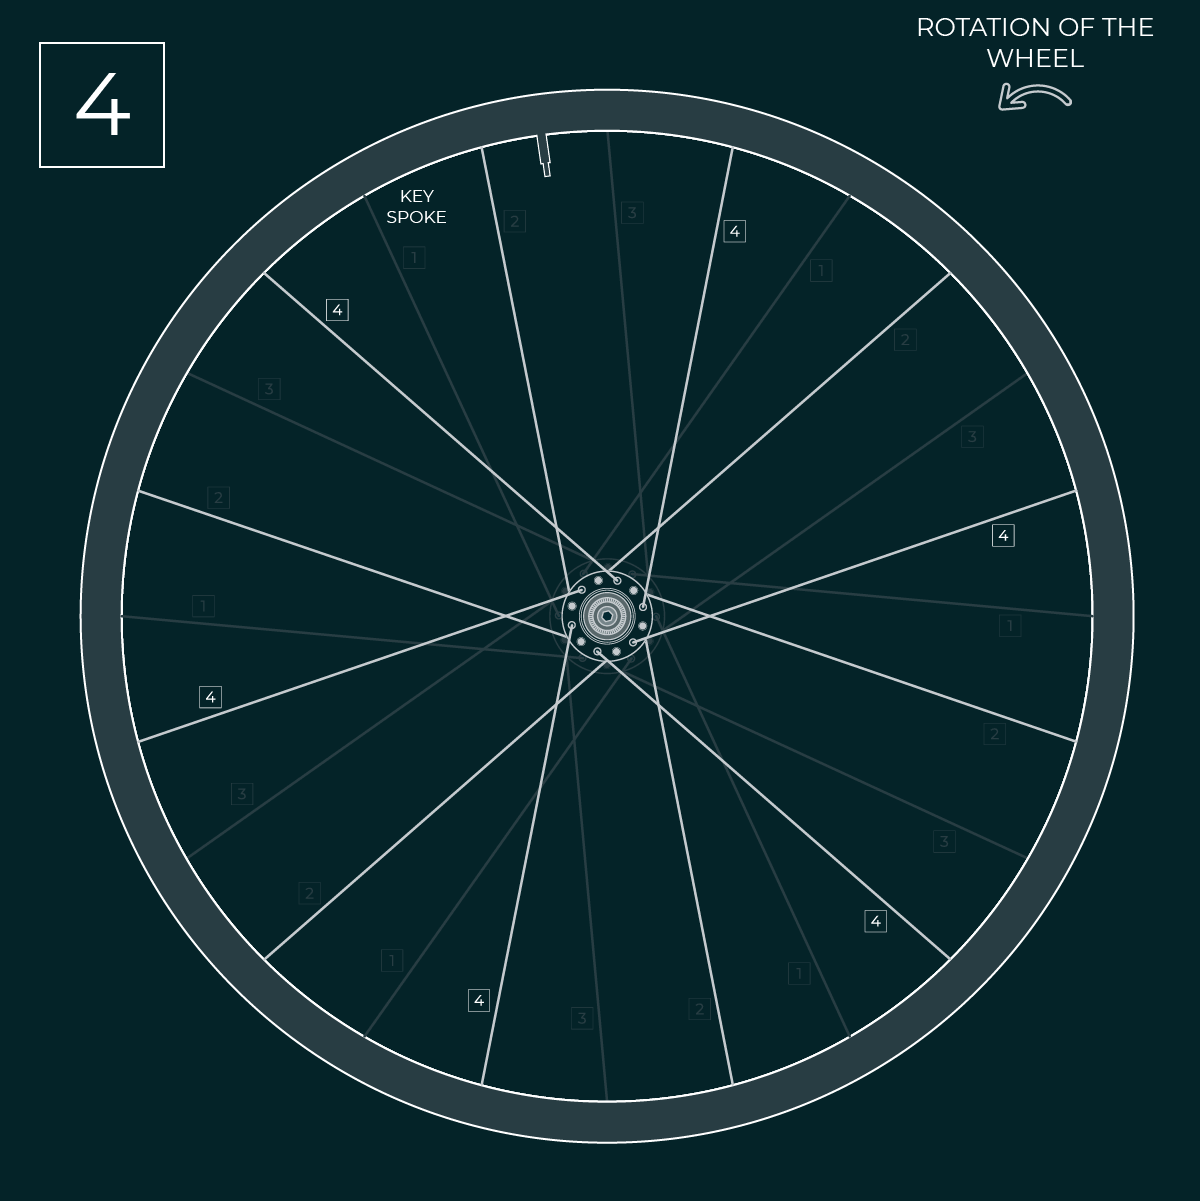
Step 1: Inserting the key spoke
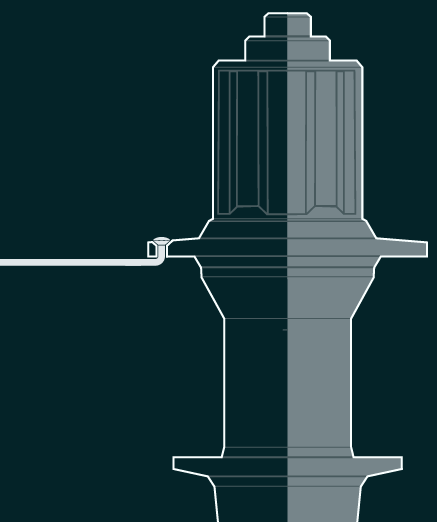
Following the logic of arranging spokes into 4 groups, we will start on the drive side of a hub and insert the key spoke in the first hole anti-clockwise (left) from the valve hole. Why there? Turns out most deep section wheels have the first spoke hole anticlockwise from the valve drilled for the nipple to point upwards.
Since we are building a wheel with 24 holes in total and both flanges carry 12 spokes, we will start with 6 spokes and insert them through hub flange towards the center of the hub, meaning they will be heads out.
Notice that you insert spokes in every other hole in the hub flange, but in every fourth hole in the rim.
Tip: Do not thread the nipple onto the spoke by its full length. I usually thread it just to the point that a thread on the spoke just disappears. That practice serves me as a reference point that all spokes on one side are nearly identically tightened.

Step 2: Continue with the non-drive side
You will now turn the wheel around and continue lacing the wheel on the non-drive side, again with 6 spokes, all heads out. Looking at a hub from the side, the holes on the flanges are not aligned. Rather, they overlap by a half.
You should now slightly rotate the hub to the right, away from the valve hole and insert the first non-drive side spoke in the hub’s flange hole just behind the spoke on the drive side. Like the first group of spokes, it will also be a leading spoke.

Step 3: Crossing spokes
And now comes the fun part - crossing spokes!
Once you finish up with first two spoke groups, drive and non-drive side, both heads out, you can again turn the wheel to the drive side (notice valve hole position) and start inserting the next round of spokes. From now on, all the spokes will be fitted from the inside of the hub pointing towards the locknuts, meaning they will be heads in. And since we have already installed leading spokes, only trailing spokes remain on both sides of the wheel.
The spokes that we are inserting now will cross the same side spokes, inserted in the first step. In our example, since we are installing trailing spokes (marked with no. 3), they should go at the outermost cross on the inside of the leading spokes, installed in the step 1. You will have to bend this leading spoke to get it around the last trailing spoke on the correct side.
Note: Crossing is always done at the outermost cross, where two spokes from the same flange are “laced”. The outer spoke will go on the inside and the inner spoke will cross it on the outer side. With any cross number, only the outermost crossing is "laced" so the spokes go behind one another.

We are just one step away from finishing with fitting the spokes. All that is missing are 6 heads in, non-drive, spokes. Crossing is done in the same manner as in the step 3.
As for the final check, since we are building a wheel with a normal 2 cross lacing pattern, every other spoke should go to the opposite hub’s flange, while each flange should have fitted heads in and heads out spokes alternating.
Congratulations, you should now have a laced wheel, ready to be trued and tensioned.
Note how the two spokes around valve hole are completely parallel and do not interfere with the valve in any way. There is enough gap for pumping the tire. Once the wheel is laced, adjust all of the nipples so that each is screwed equally far onto its spoke. This will make it far easier for truing the wheel later on.
Note: As mentioned before, following this method you will have trailing spokes with heads in while leading spokes being heads out.

HOW TO SPOKE A WHEEL – 2nd way
Following the theory about trailing and leading spokes, we can now further refine my typical way of building a wheel that should be even more durable. In this other way of spoking a wheel, leading spokes should be on the outside of the flange, meaning they have heads in, and trailing spokes, quite the opposite, having heads out.
Step 1: Inserting the key spoke
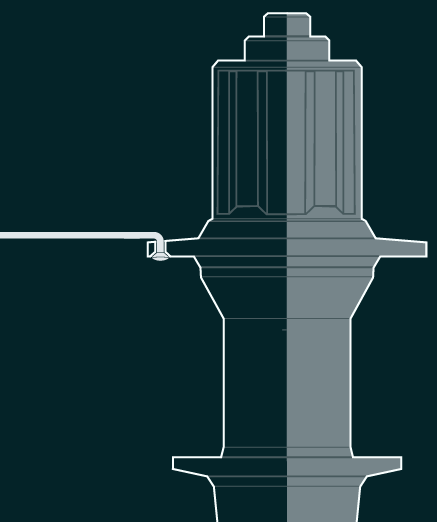
Following this method, our key spoke won’t be positioned right next to the valve hole, but rather in the second hole clockwise, which makes this method a little less intuitive for a beginner. Again, the first hole clockwise from the valve is drilled for a nipple to seat and be pointing towards non-drive side – this is our limitation and prevents us from starting there.

Step 2: Continue with the non-drive side
After turning the wheel around, we twist the hub counter-clockwise and insert our first non-drive side spoke in the hole behind our key spoke and right next to the valve hole. Note how we are again twisting our spokes away from the valve hole. This will later on create a gap between two parallel spokes that surround the valve for pumping the tire.
Again, first two groups of spokes will be heads out as they are easier to fit at the beginning of lacing the wheel.

Step 3: Leading drive side spokes
In this step as the heading suggests, we are inserting our first group of leading spokes (heads in), on the drive side first. Note that one of them is just behind the valve hole, but since it is a head in spoke, it would be impractical to start with it as the key spoke in the first place.
Again, crossing is done in the same manner as before. At the outermost cross, two spokes crossing are laced one under another.

Step 4: Finalizing the build
Just like before, we are left with just one group of spokes, non-drive, heads in and also leading spokes (see the direction of wheel turn) at the same time. This method, like I said before, takes into account that leading spokes should be outer spokes while trailing spokes should be kept on the inside of the hub flange.
Appendix: Radial spoking
Now that you have mastered cross lacing patterns, radial spoking should come easy for you. In radial spoking, spoke run directly from the hub to the rim, so therefore we do not have trailing nor leading spokes. In that way our original four groups of spokes reduce to just two step process.
Start inserting all the holes on the one flange of the hub with your spokes. Having checked where your rim angle holes are pointing, we will start next to valve hole counter clockwise.
Note: Usually, in radial spoking all spokes are heads out which makes a wheel a little more aerodynamic and also adds on aesthetic.

When you turn your wheel around, you can repeat the process with remaining group of spokes. Since we are not dealing with crossing lacing pattern, you won’t have to bend spokes to get them in place and this will speed up lacing the wheel.

Final thoughts
Hopefully from reading this article you now think that lacing a wheel is really not a dark art. It is rather a routine process for most seasoned wheel builders. Once you get the logic and consider all conditions, you should get a clearer, broader picture of your build. Understanding lacing patterns will also help you better tailor your wheelsets to suit your client’s needs. And remember, with practice you will get better and do things intuitively.
Enjoy wheel building!
Enjoyed this article?
Buy me a coffee to support my work!
Every coffee helps fuel more content like this!
About author

Aljaž Trenta
Author and founder"As a cycling enthusiast, bike mechanic and self-taught web designer, combining several of my passions and skills to build SpokeCalc was a great fun for me."