Cannondale AI (asymmetric integration)
According to Cannondale, there are several benefits of their all new AI, asymmetrically offset rear triangle and drivetrain. The Cannondale AI offset shifts the rear hub and drivetrain 6 mm to the right, delivering super short chainstays without any of the usual compromises, and a rear wheel that is dramatically stiffer and stronger because the spoke tension and angles are equal on both sides. By doing that Cannondale claims benefits, such as the shortest chainstais on the market, for incredible traction, better stiffness and agility, up to 60% increase in rear wheel stiffness, and ample tire clearance.

ALTERNATIVES TO A CUSTOM WHEELSET
By looking at available wheelsets on the market, the main problem was that they were already ‘dished’, meaning having rim perfectly in the center of the hub underneath. One alternative my client pointed out, was buying such a standard, already “dished” wheelset and modifying it to fit the Cannondale’s frame by “re-dishing” the rear wheel 6 mm to the left by tightening non-drive side spokes to an equal tension which would even out bracing angles on both sides of the wheel.
Doable, of course, but that would inevitably mean non-drive side spoke length would be shorter while drive side spokes would need to be a bit longer. Spoke length was my main concern. But, what would be that difference in reality?
To check my presumption, I entered some data into spokecalc.io and got approximately 0.5 mm difference in spoke length for both sides in standard dished rear wheel versus the wheel I was building, following Cannondale’s asymmetric integration idea.

Yes. From knowing the difference in spoke length for a dished wheel versus Cannondale’s Asymmetric Integration offset wheel, one could very well re-dish existing wheelset, available on the market.But for multiple reasons, including some elements of personalization, the idea of re-dishing a standard wheelset didn’t go through.
In the end we decided to make a completely new, custom disc brake wheelset that would fit in the frame of my client's Cannondale Topstone gravel bike.
GOING FOR A CUSTOM CANNONDALE AI WHEELSET
First let’s look at components, that were picked for this custom offset wheelset.
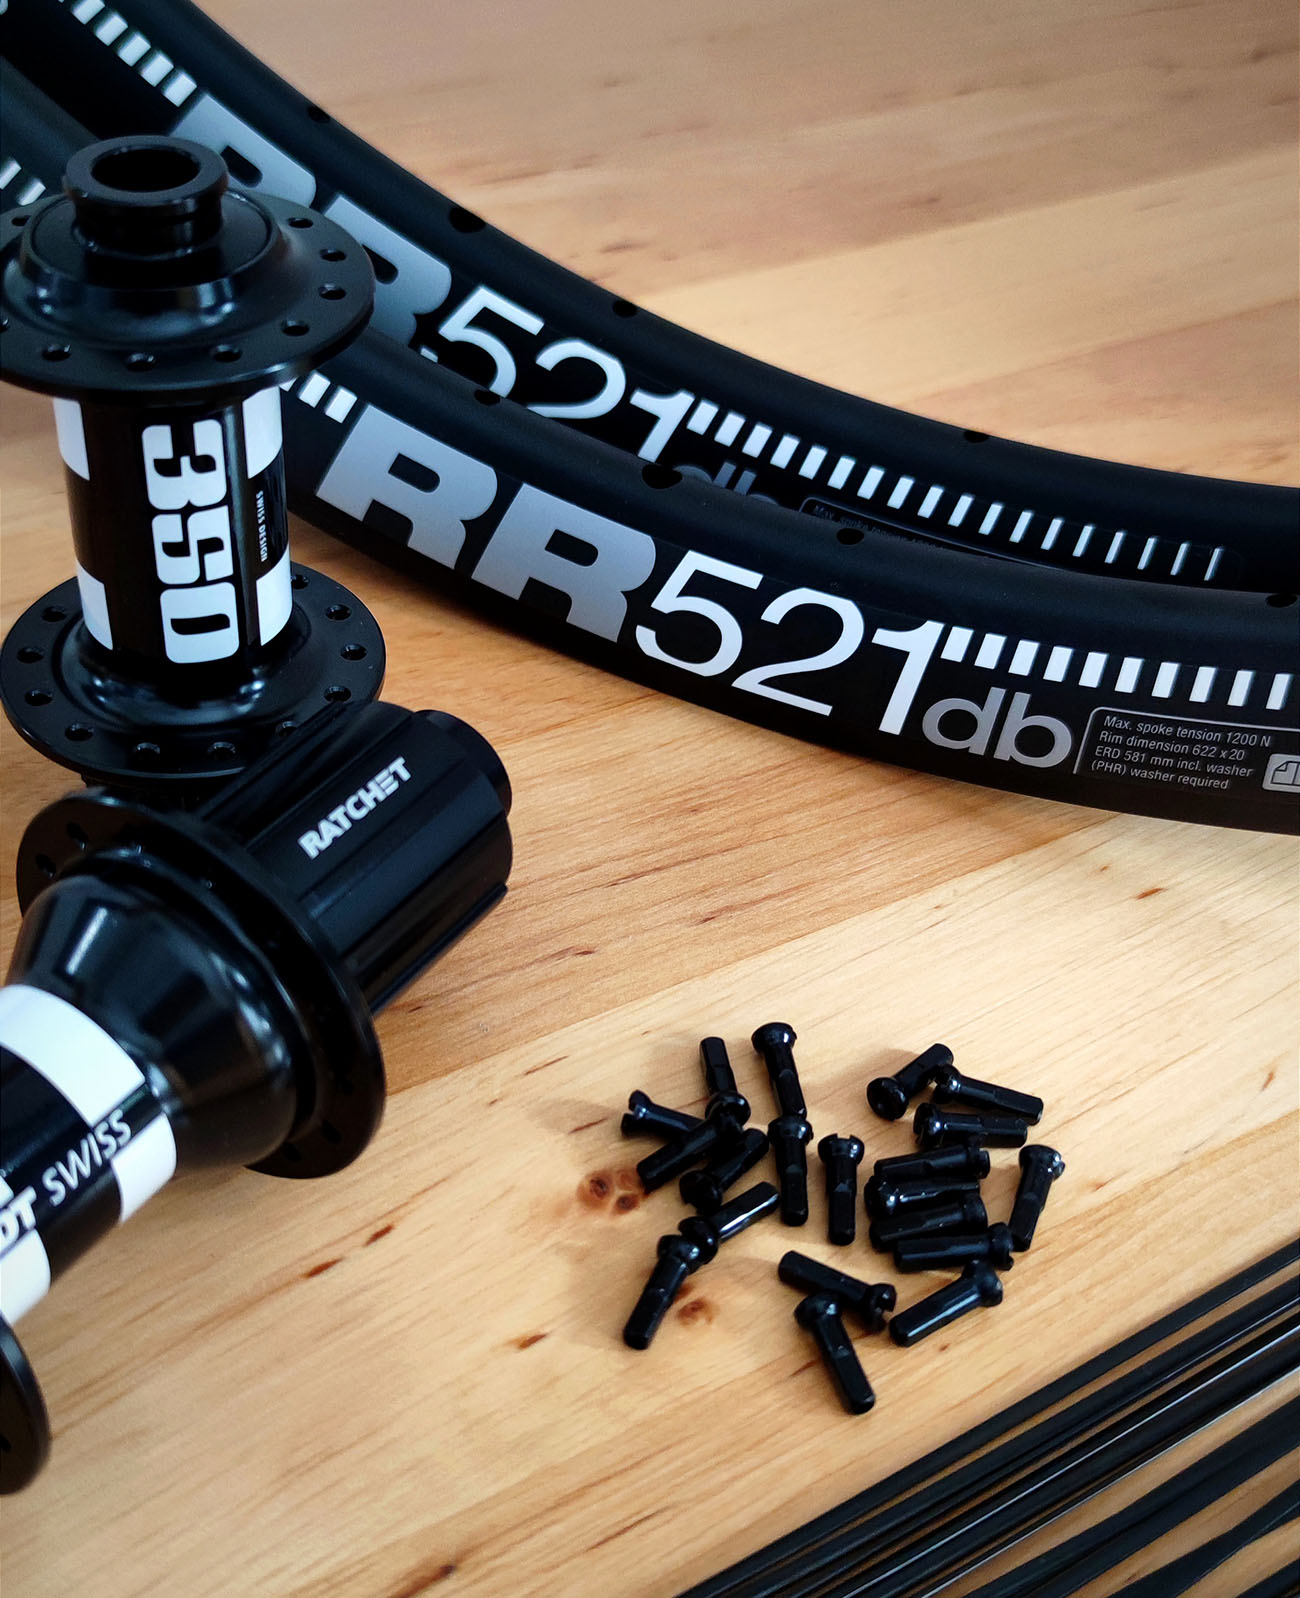
- Hub: DT SWISS 350 100/142mm 28H
- Rims: DT-SWISS RR 521db 32mm/24mm 28H
- Spokes: Sapim CX-Ray J-bend
- Lacing: 2x (front DS/NDS), 3x (rear DS/NDS)
*Low spoke count and lacing pattern were chosen accordingly with client’s low body weight and a wish to have a premium, almost competition ready aluminium wheelset.
SPOKE LENGTH CALCULATION FOR THE REAR WHEEL
If the front wheel is to be completely conventional, standardly dished, with the rim centred between locknuts of the hub, the rear wheel would have to be 6 mm offset to the left in order to fit into the frame’s rear triangle.
So, how would one include Cannondale’s recommended 6 mm offset of the rear wheel into the spoke length calculator? Either by modifying effective left and right flange to center dimensions or by including offset spoke bed (OSB) measurement.
If my original DT Swiss 350 hub’s left flange to center and right flange to center dimensions were 32.5 mm and 20 mm respectively, I subtracted 6 mm from the left flange to center (26.5 mm) and added the same amount to the right flange to center (26 mm). In that way I took into account a 6 mm offset of the DT Swiss RR 521db rim. In the screenshot below there is a spoke length calculation in spokecalc.io using real hub dimensions instead of effective flange to center dimensions with combination of 6 mm offset spoke bed (OSB).
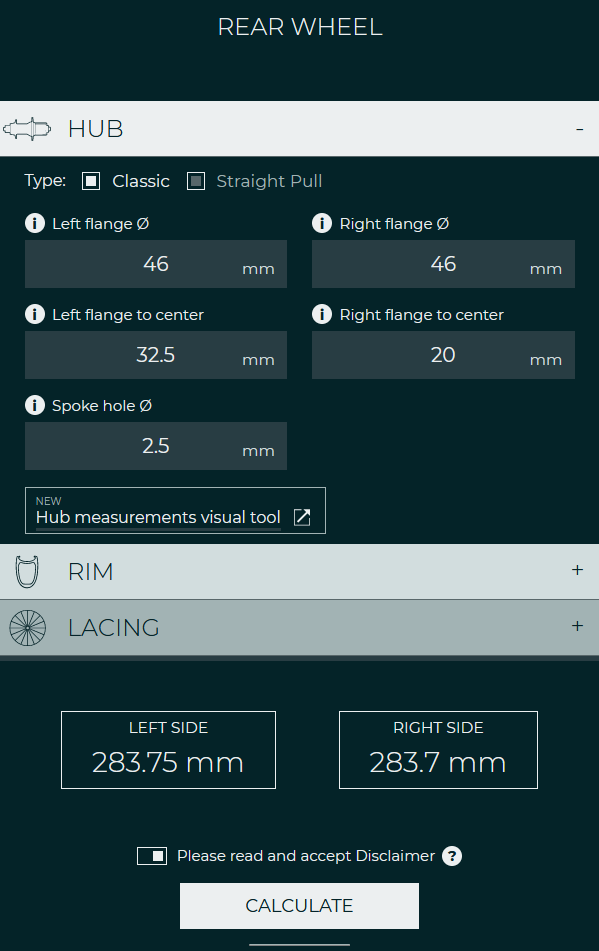
Note how using a 6 mm offset of the rear wheel to the non-drive side of the wheel gave us almost identical spoke length for both sides and as a result also more even spoke tension.
Note: one could very well use only one modification in rim/hub measurements, and that is the offset spoke bed (OSB). This would trick the spoke calculator in such way that even though the rim is symmetrical, spoke holes are 6 mm offset to the non-drive side of the rear wheel. Result would be the same as with the method mentioned above.
DISHING AND TRUING THE WHEEL
Surprisingly, dishing the rear wheel in accordance with Cannondale’s Asymmetric integration 6 mm offset was even easier in practice that I thought it would be. I started by winding all spoke nipples onto the spokes up to the end of spoke’s thread. That was also my starting reference that all spokes are tightened the same way.

The process was followed by counting turns of every spoke nipple around the wheel and simultaneously observing radial trueness of the wheel. Still, to that point, I haven’t touched my spoke tension meter and I was already feeling tension on spokes. Only then I continued with my Park Tool’s TM-1 spoke tension meter.
On the other hand, literally most of my rear wheel’s lateral trueness and offset I achieved just by using spoke tension meter and tightening all spokes to an almost equal tension. If I normally check if a wheel is properly dished several times, here, I was almost spot-on on the very first try.

For checking my rear wheel’s AI offset, I used my Park Tool’s WAG-5 wheel alignment gauge. Except, contrary to standard, dished wheels, calliper of the dishing tool shouldn’t touch the locknuts of the hub on both sides of the wheel. If I was aiming for 6 mm offset to the left, when my calliper touched the right locknut of the hub (freehub side), then on the non-drive side, there should be exactly 12 mm of space in between wheel alignment gauge’s calliper and the locknut.

Finally, it was time to mount the tire and test how this custom DT Swiss rear wheel fits Cannondale Topstone frame. Fortunately, everything came out nicely with an offset that is just right for this gravel bike. In the end, this Vittoria Corsa Graphene tire with its width of 30mm still has a lot of clearance on both sides.

Final thoughts
Building a custom wheelset in accordance with Cannondale’s all new paradigm of Asymmetric Integration frame designs was an interesting project for me and as such, worth documenting. Achieving the same spoke length and almost even spoke tension is also a breath-taking feature for a contemporary bike's rear wheel to have. Such a wheel is indeed much stiffer and stronger, so all in all, chapeau to Cannondale for giving us that innovation.
Happy wheel building!
Enjoyed this article?
Buy me a coffee to support my work!
Every coffee helps fuel more content like this!
About author

Aljaž Trenta
Author and founder"As a cycling enthusiast, bike mechanic and self-taught web designer, combining several of my passions and skills to build SpokeCalc was a great fun for me."