
WHEEL BUILDING STAND
Wheel building art starts with nipple lacing operation where nipples are feeded into a rim and joints are made with spokes and hub. Lacing up a wheel is always labour-intensive, so it’s not really surprising that pro wheel builders have embraced a variety of tools to assist with this process. Such lacing jig holds the hub and rim in place so that both hands are free to thread the spokes and attach the nipples. A similar design wheel building stand can be found in this Cycling Tips article - A look at the tools professional wheel builders use.
Thinking of having such a tool in my workshop for a long time, I finally said to myself, why not do this kind of a jig on my own. I usually lace a wheel sitting on a chair while the rim is in my lap and on my knees. On the other hand, a disassembly of a wheel was more or less a process, done on a truing stand. And, by the end of it, when taking out the last few spokes the whole rim wobbles. An unpleasant moment for those who do it in the same way. Such a wheel building stand would enable me to brake or lace a wheel in a more convenient way.
Thinking of its flexibility and lightness, I know I had to make an aluminium construction. Read more on aluminium profiles technique, assembly technology and basic connection elements on Bosch-Rexroth website. If you haven’t heard of it, this technology basically allows an easy assembly of variety of stands, used widely for industrial purposes.
DIY LACING JIG - DRAWINGS
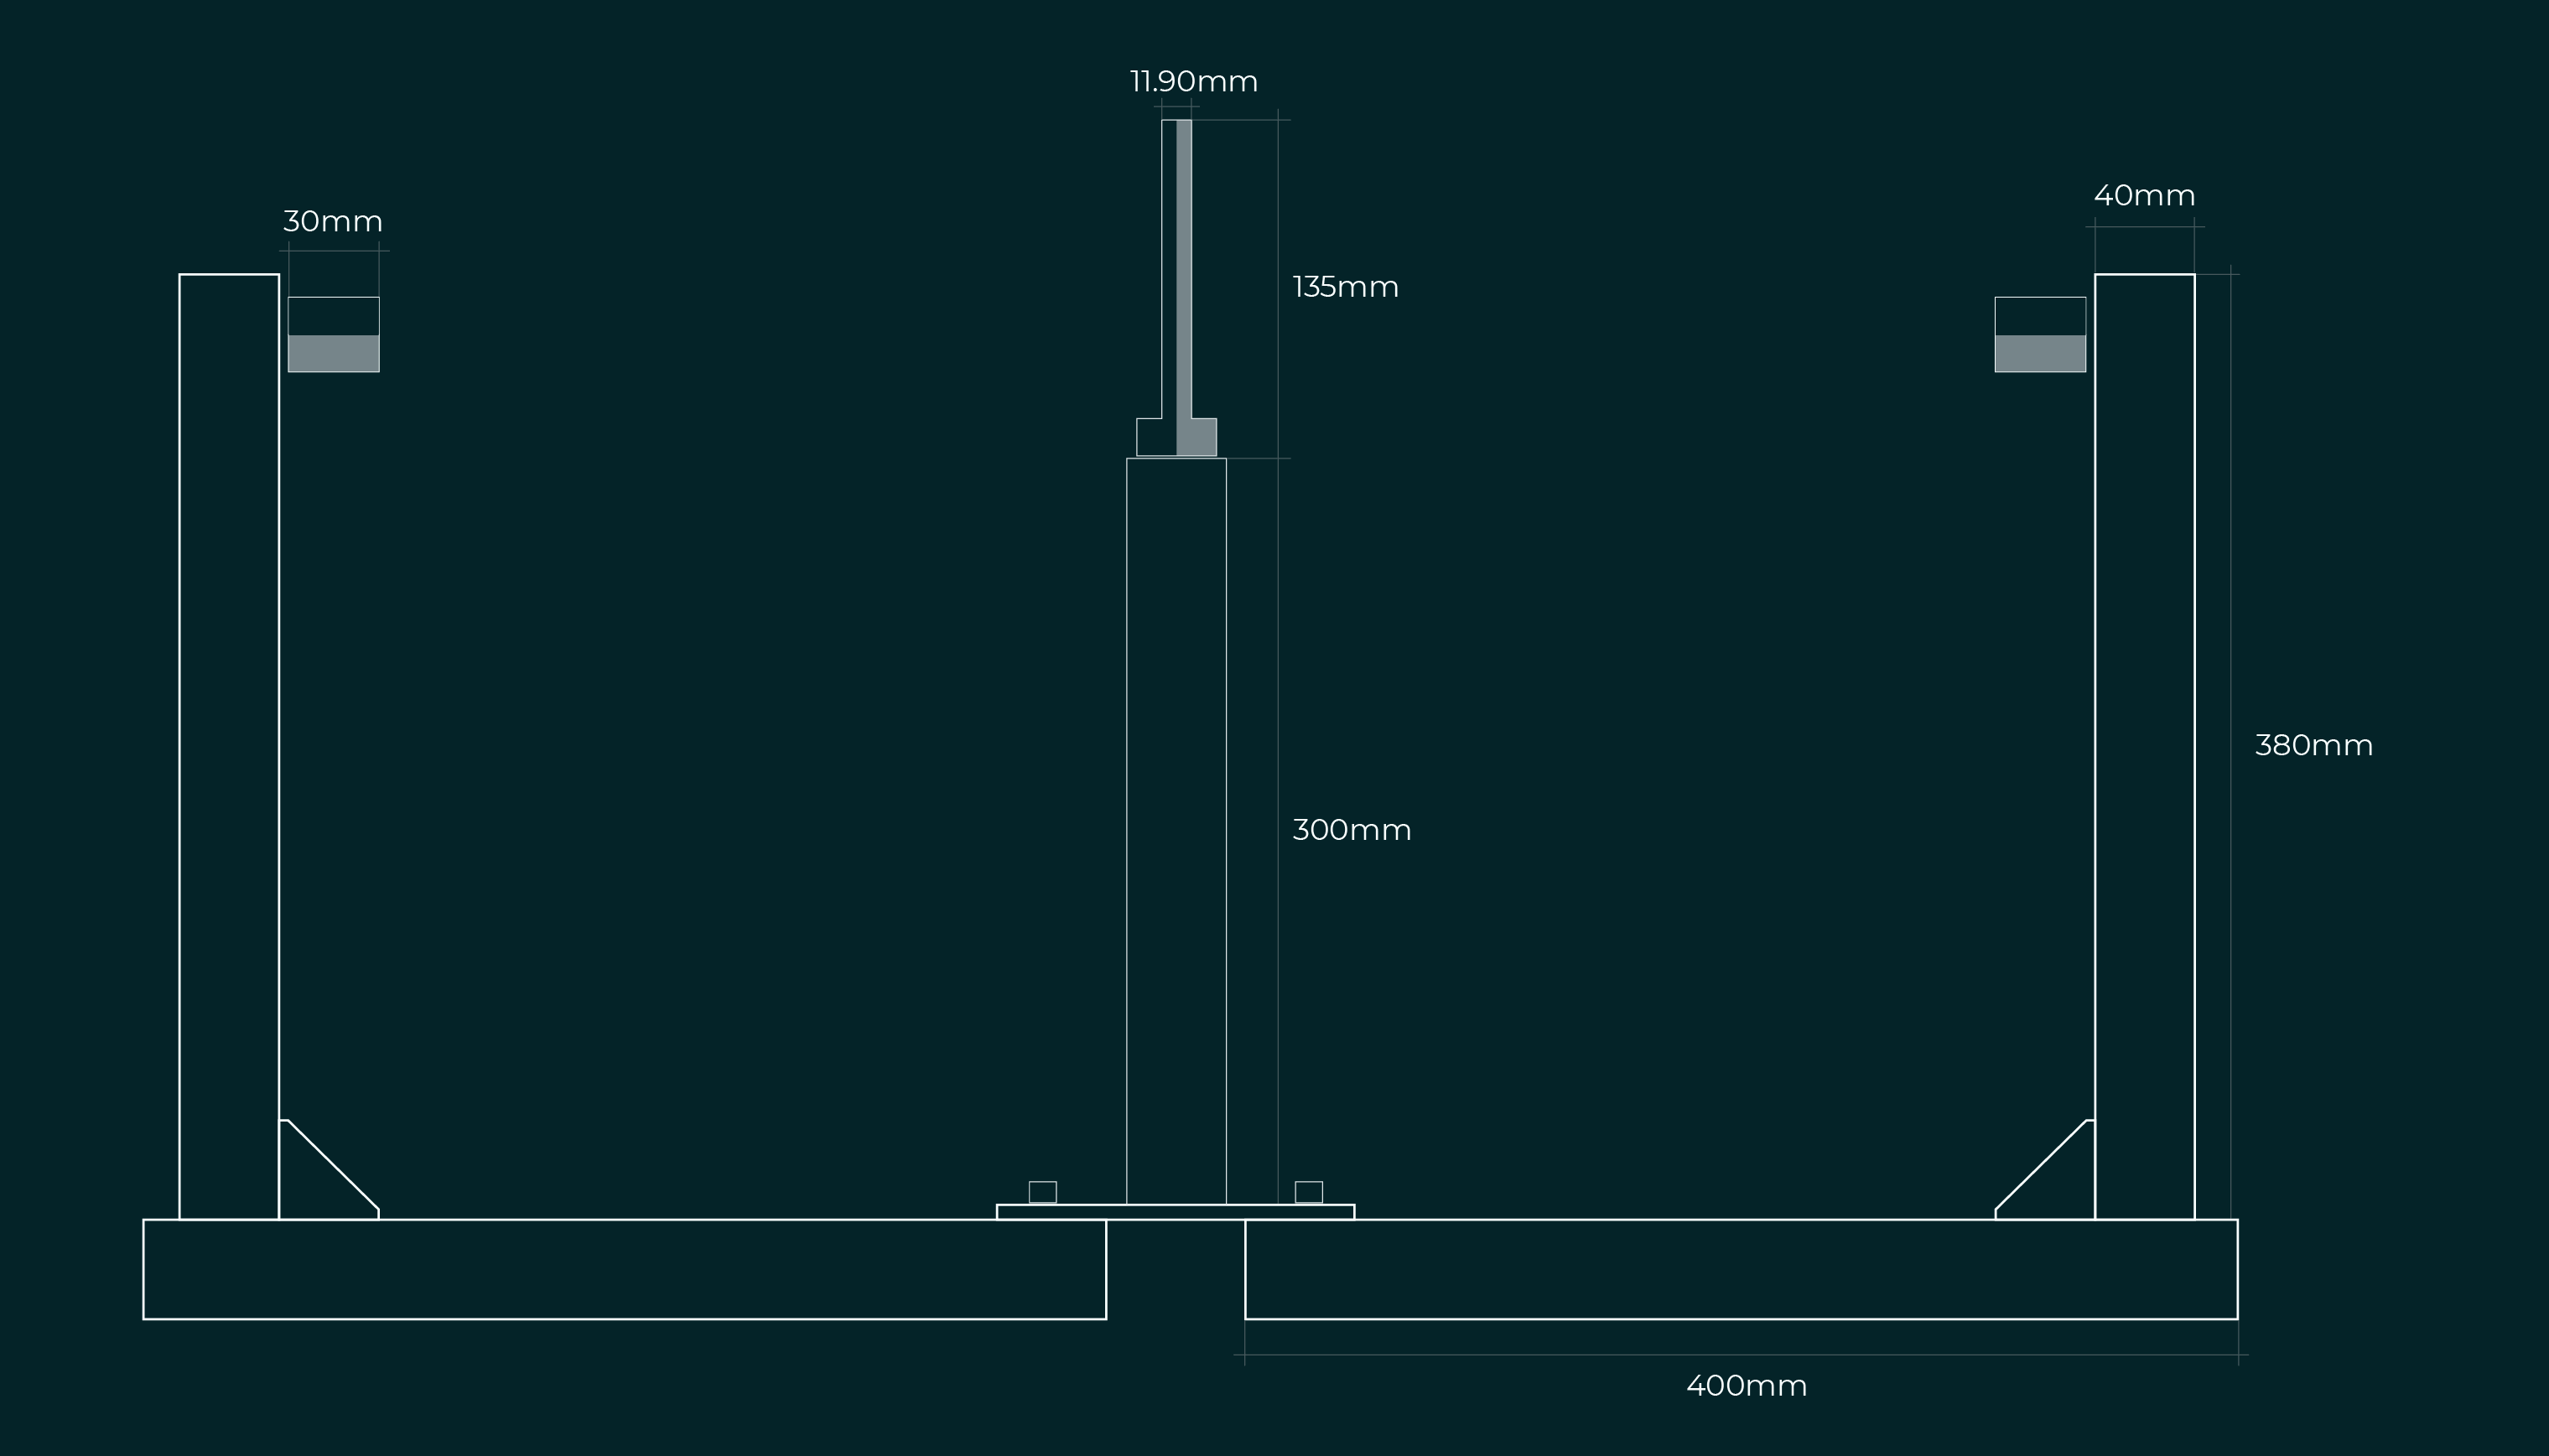
I first had to plan and to specify all the dimensions of this wheel building stand. That included some thinking about its versatility. My wishes weren’t modest. Rim dimension adjustment was one of them. To make jig with adjustable arms, so it will be suitable for a wide range of wheel size. from a 20" wheel to a much bigger 28" road rim. Another aspect I had to consider was wheel hub type compatibility. I should be able to mount different hub types, quick release and thru axle included. But more on this a little later. Here are raw dimensions of my wheel building stand.

ASSEMBLING THE STAND
It took some time I acquired all the necessary parts for the assembly. That included aluminium profiles cut to length, connection elements, angle pieces (brackets), plastic covers as well as some steel custom made hub adapters and inox plate for fixing a central pillar. Aluminium profiles are square shape, 40 by 40 mm and with slot for M8 internal nuts.

For this project I got custom machined steel hub adaptors. With these inserts on top of the central pillar, I can mount through axle type hubs (15mm and 12mm) as well as hubs with ordinary quick release.
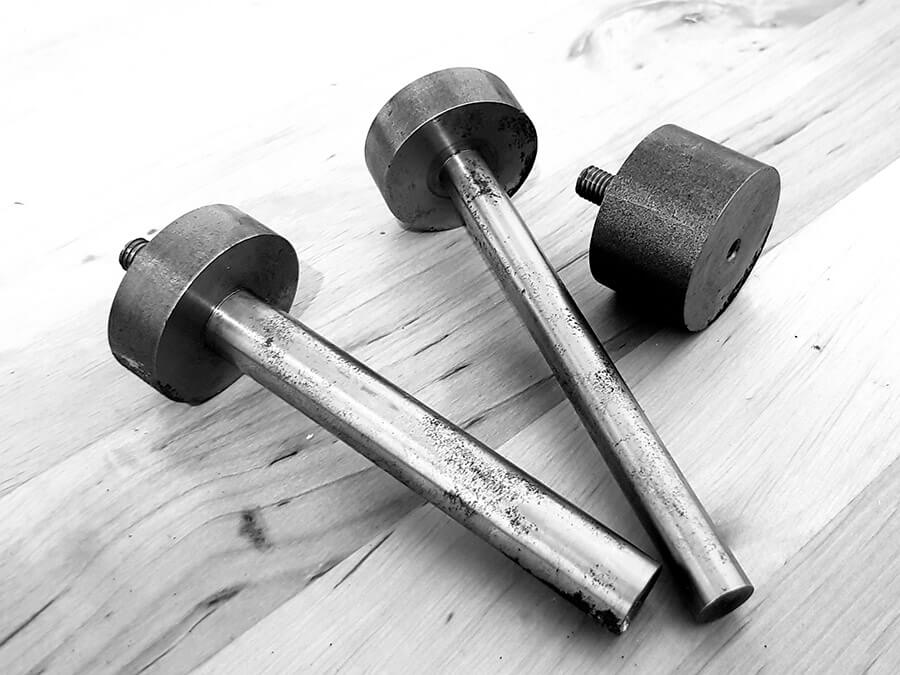
A 15 mm adaptor should enable me mouting most front MTB wheels, while a 12 mm hub adaptor will be mostly in use on road bike wheels. The last adaptor, one on the right, has an internal thread so a quick release can be threaded onto it and support such a hub.
Ok, the next little detail that makes this wheel building jig special is a roller that allows a rim to rotate on the stand without any damage on the sidewalls. You can buy this part in a store. However, this the thread of it was machined to a smaller, M8 thread size so I could connect it to standard aluminium profile technique internal nuts.

I chose a swivel-in sliding block (a type of internal nut) thath allows you to change height of this rollers on sidearms of the stand while still holding it in place even if a roller is loose. You can find a reference of such connection elements on Bosch-Rexroth website. Adjustable rim height on these sidearms allows aligning a rim in the center of wheel hubs with different O.L.D.’s (over locknut dimension).

Below is my 6 mm thick custom laser made inox plate for a central pillar. Initially I had two holes drilled for each arm, however, since my plan changed a little since I got this piece, only one bolt was used for each arm of the stand. The central pillar is 300 mm long and of fix length and as such it doesn't allow changing height of a hub itself.

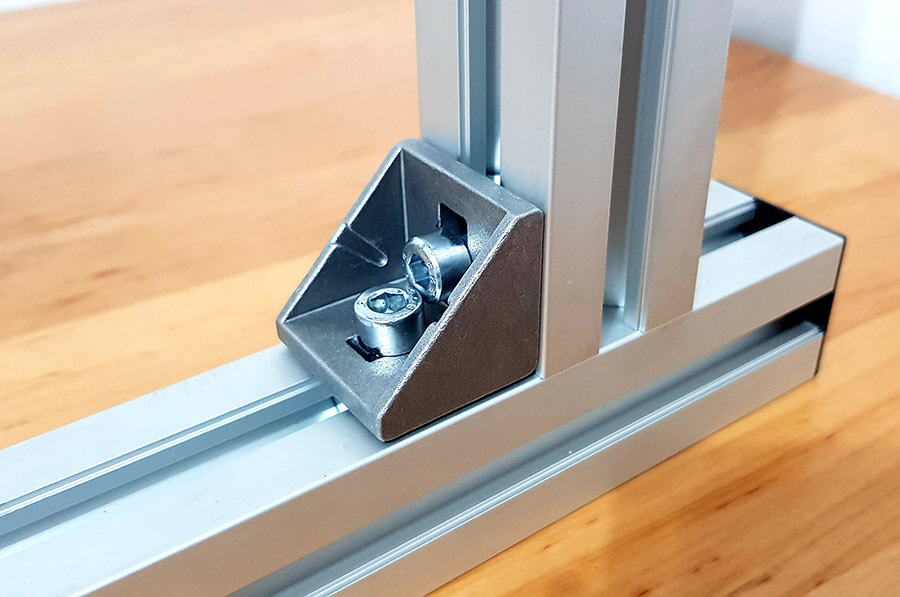
All joints are sturdy yet adjustable. Strong angle brackets with M8 hex bolts will support sidearms just fine. Fine tuning in terms of rim dimension adjustment is easy and quick. I just need to put some measuring tape and mark different wheel sizes so I can adjust sidearms in or out to support a rim quickly. Once you set your rim dimension, you can cover those brackets with plastic caps.
Let's put it to the test! Here is my fully assembled, brand new lacing jig. A wheel building stand that will allow me to lace a wheel, service it and even replace stickers on a rim. Making such, exotic, very specific and problem oriented tools is becoming a new passion of mine.

FINAL THOUGHTS
A wheel builders’ workshop should be a tidy and organised place with every tool stored in its place. That Is why I also made a wall hanger to mount this wheel building stand onto a wall when it is not in use.

To sum up, this rather exotic tool of my trade was fun to plan, construct, assemble and even put it to the use. In fact, many of wheel building tools are rather specific and deserve such an article on its own. I would be happy to write another “A look at the tools professional wheel builders use” type of article in the future.
Till next time, happy wheel building!
About author

Aljaž Trenta
Author and founder"As a cycling enthusiast, bike mechanic and self-taught web designer, combining several of my passions and skills to build SpokeCalc was a great fun for me."