
Preparation phase
What intrigued me most about this project was the preparation phase itself. In contrast to known wheel setups, I spent time running scenarios especially considering geometry aspect. I approached this build with the idea of improving tension balance through:
- Spoke choice (Alpina Hyperlite Aero)
- Rim architecture (asymmetric rim profile)
- Upfront estimates (Quick Tension Guide widget)
The goal was to see to what degree thoughtful component pairing can improve wheel structure, not just reduce grams. Going light while trying to minimise induced compromises. And the main quirk of the gig? Combining lightweight flexible Hyperlite Aeros on non-drive side with the more rigid Ultralite Aero spokes to provide slightly better tangential support for torque transmission. Here's how it came together.
Understanding tension balance
When wheelbuilders talk about “tension balance,” they’re usually referring to the difference in spoke tension between the Drive Side (DS, e.g. right) and the Non-Drive Side (NDS, e.g. right) of the wheel. Newer builders often assume spoke tension should be equal on both sides, but that’s almost never the case. The geometry of your components plays a major role here, where hub spacing, flange offsets, or even rim design define the tension balance.
Aiming to make the App SpokeCalc more beginner-friendly, I recently added a Quick Tension Guide to the app, along with a visual explainer article on spoke tension fundamentals: why it matters, what affects it, and how understanding it brings clarity to your builds.

Tension imbalance is often underestimated or ignored entirely, but it has real consequences. Poor tension distribution can lead to truing issues, recurring servicing, and inevitably shorter lifespan of a wheel.
If you’re pursuing featherweight designs, the need for proper tension balance becomes even more critical. Light wheels often demand tighter tolerances and more careful planning — and they usually require more frequent maintenance, especially under heavy loads. That’s why predicting tension upfront is one of the smartest moves you can make.
That becomes particularly relevant when the rider, like in my case, is at an elite-ish fitness level, putting down sustainable power in the low 400-watt range. With such forces, structural weakness or poor balance are bound to appear soon. Otherwise the wheel will become a limiting factor.
That was the real fear I had in mind from the start.
Explore more on the topic of spoke tension with one of the most read articles on my blog: Spoke Tension - The definitive guide to spoke tension
Spoke choice: Alpina Hyperlite Aero
This build was centered around hyper light stainless steel spokes from the very beginning. While I’ve used Alpina spokes in the past and always appreciated their quality, this was my first time working with their flagship bladed model — the Hyperlite Aero. It’s a premium aero spoke designed with a clear purpose: to combine light weight with serious performance.
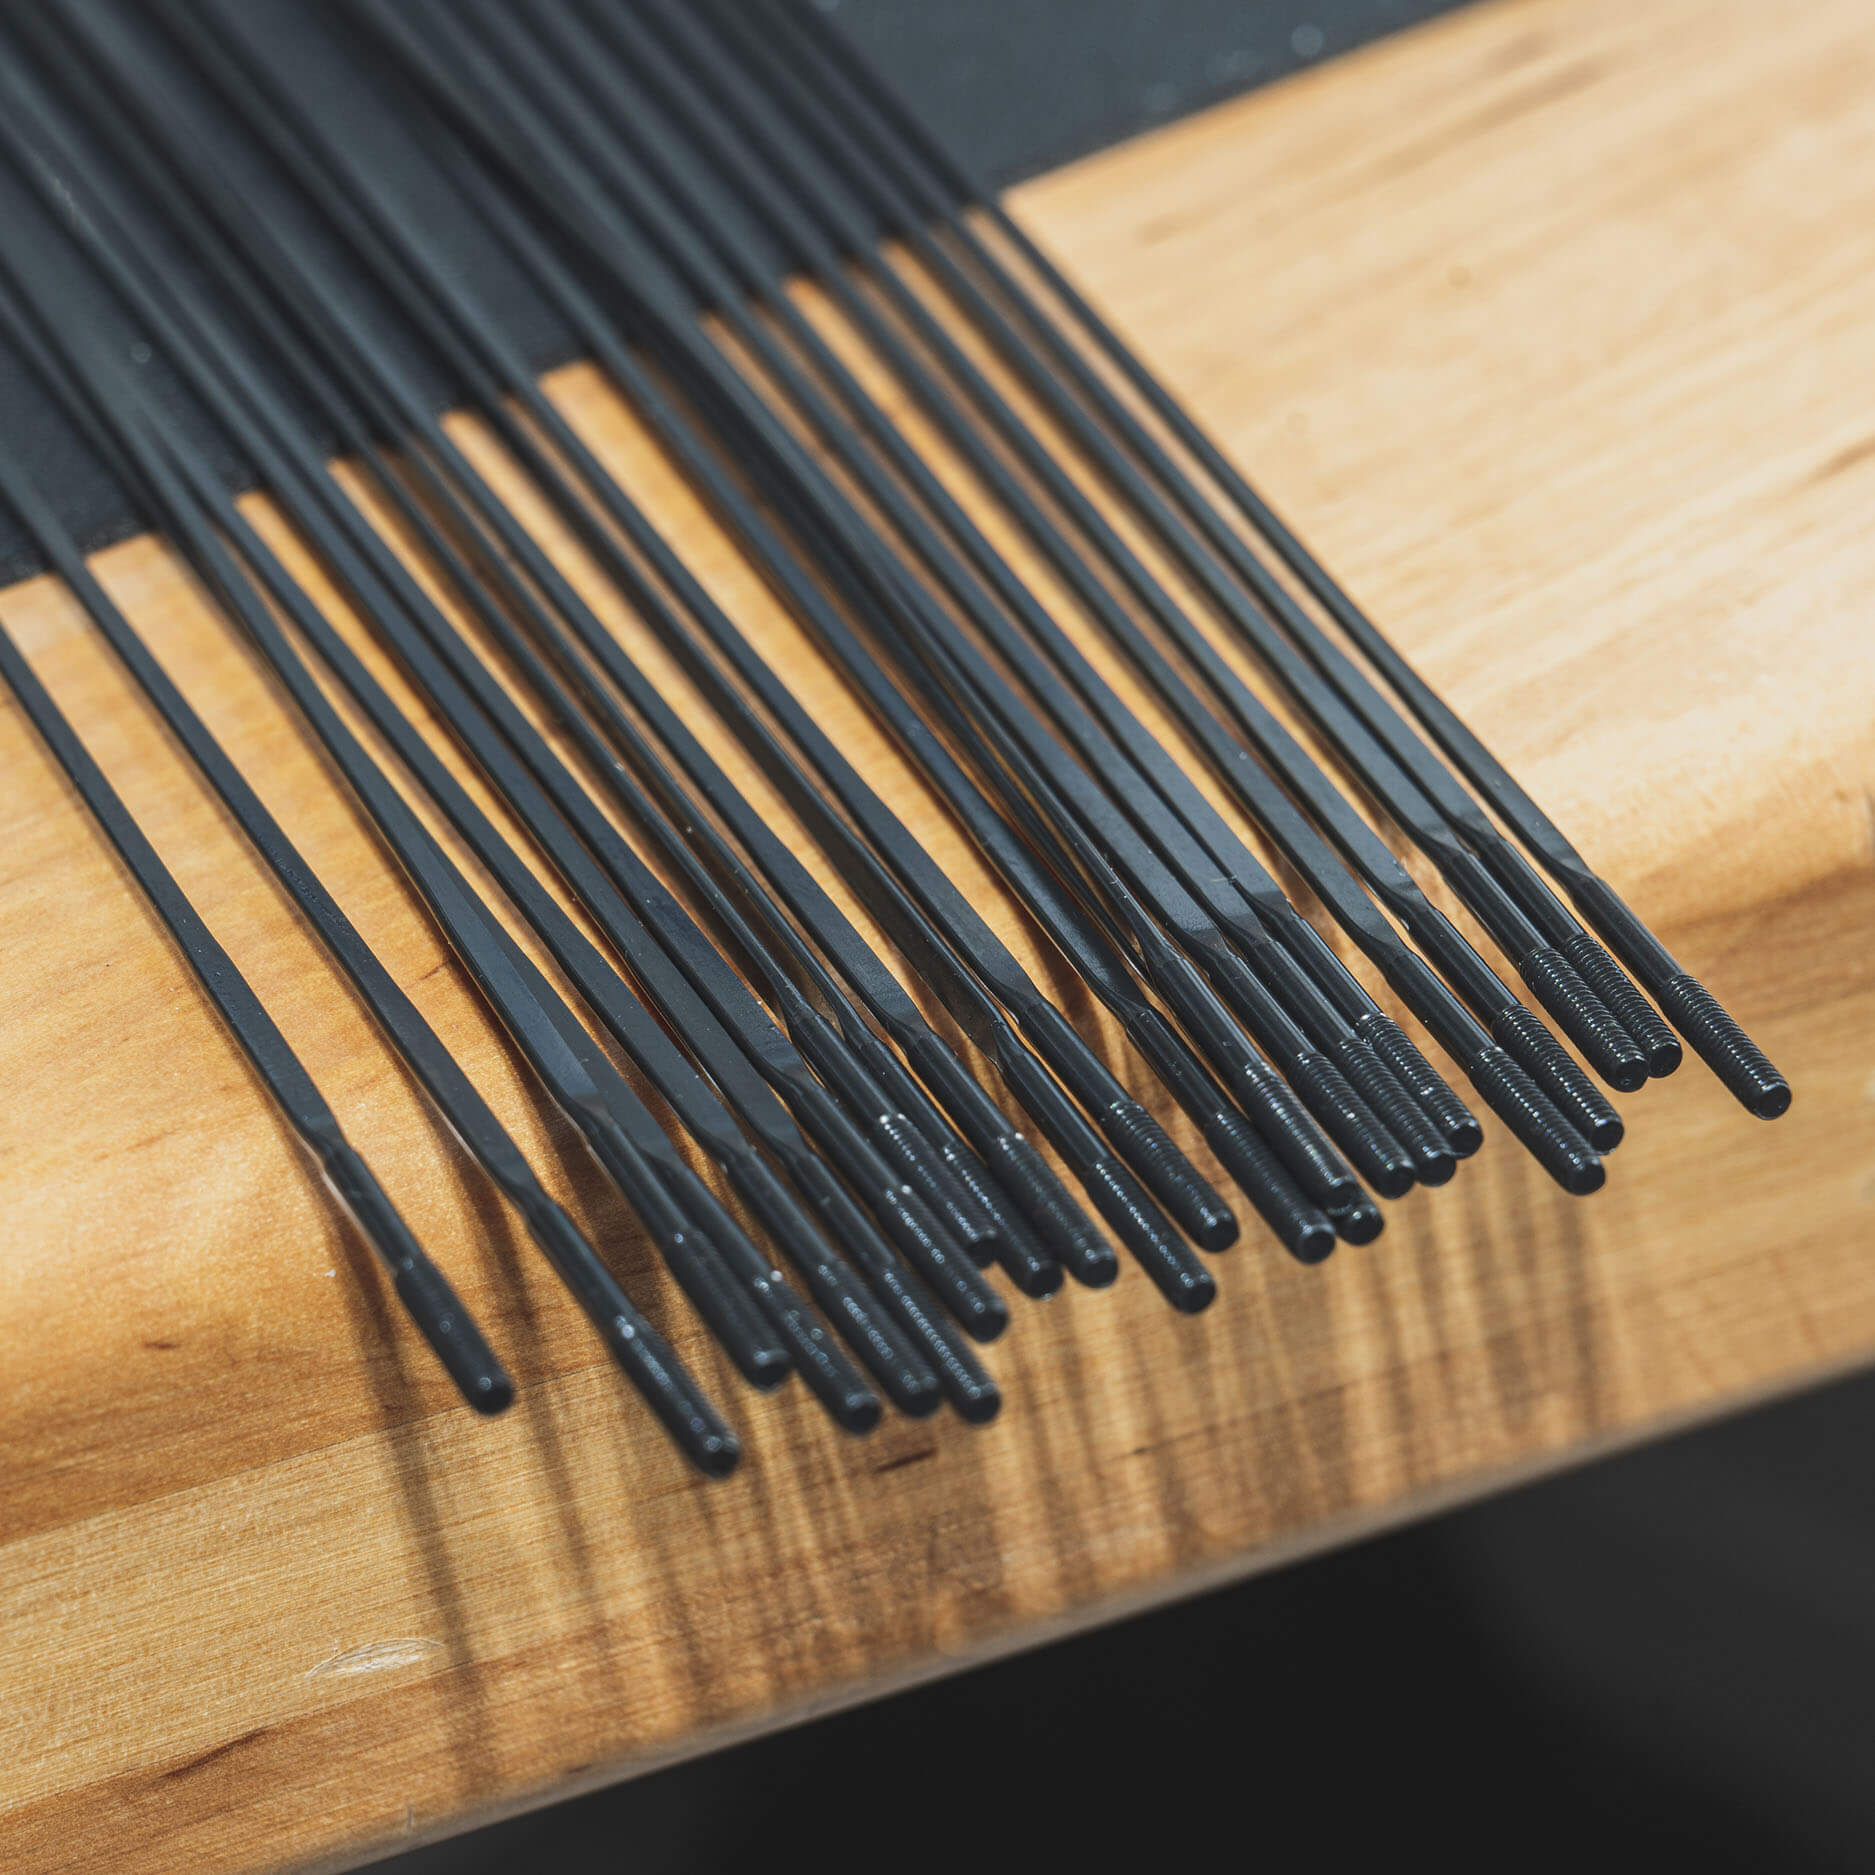
One unique detail about the Hyperlite Aero is its distinctive blade profile. Unlike standard bladed spokes with a uniform flat section, these have a wider aero section at both ends, tapering toward the center reflecting in the following dimensions - 2.00 / 2.20 / 2.00 x 0.90 / 2.20 / 2.00 mm – as can be seen on the product technical drawing below.

It looks like a dual-stage blade, slightly wider where it exits the hub and just before entering the nipple while flared in the middle section. This is definitely a distinctive feature that you most likely won't encounter elsewhere.
And, "oh-boy", this spoke is light. On the digital scale, one spoke weighed in at just 3.8 g at a length just shy of 280 mm — impressively low for a stainless-steel spoke. With specs like that, it blurs the line between stainless steel and what you'd expect from the titanium spoke segment.

The low weight, combined with the flat aero profile, made it a perfect match for a high-market performance road wheelset. But the real test was still to come with the build.
Pause here. Don’t be surprised by the elongation.
If you're using these spokes in a spoke length calculation — whether imported manually or selected as a saved spoke inside SpokeCalc — be aware that stretch at around 120 kgF can exceed a full millimetre. That’s a lot, especially when you're chasing precise lengths. A small decision like rounding up or down can have real consequences, either resulting in poor thread engagement or forcing you into an unwanted re-lace.
To illustrate this, I ran a basic stretch test under significant tension. The result shows just how much these spokes can elongate when stressed. Definitely something every builder should account for before cutting or ordering spokes.


Note: Are you building with light stainless spokes? Then you’ve probably come across the term spoke elongation – and it’s not just a detail. The lighter (and thinner) the spoke, the more stretch you need to factor in during calculation. Otherwise your spokes might turn out too long.
This means the builder should treat elongation as a feature, not a flaw. Being placed on flexible end of the spectrum, the Alpina Hyperlite Aero builds up tension more gradually compared to stiffer, more rigid models in the manufacturer's spoke range. You'll notice it requires more careful tensioning, frequent de-stressing, and some significant (at least initially) changes between pre- and post-tension states.
For comparison, even Alpina’s most popular bladed spoke — the Ultralite Aero — while only at around 0.4 grams heavier per piece, behaves quite differently during the build. It feels stiffer and tensions up quicker, with less visible spoke stretch. But that is a tradeoff I guess. You get exceptional weight savings with the Hyperlite, but it demands a more patient, controlled approach during wheel build-up.
Why am I mentioning the Ultralite Aero model here? As mentioned, I resorted to Alpina Ultralite Aero on the drive side of the rear wheel, to provide a better torque support while still keeping the weight low all in all.

Beware of spoke twist.
During the build, I encountered a slightly unexpected behavior. A tendency for these spokes to remain twisted even under tension.

The super-slim bladed profile makes them prone to twist at both the rim and hub ends, and a visual double-check or manual straightening becomes almost required. Don’t expect the spoke heads at the hub to stay aligned after even moderate adjustments at the nipple side.
Can this be prevented? Possibly not entirely, I suspect a small drip of oil at the spoke neck might help reduce friction. But either way, a second check is strongly advised. Check out the video below, giving an idea of how to approach this matter.
Rim choice: Resorting to asymmetric profile
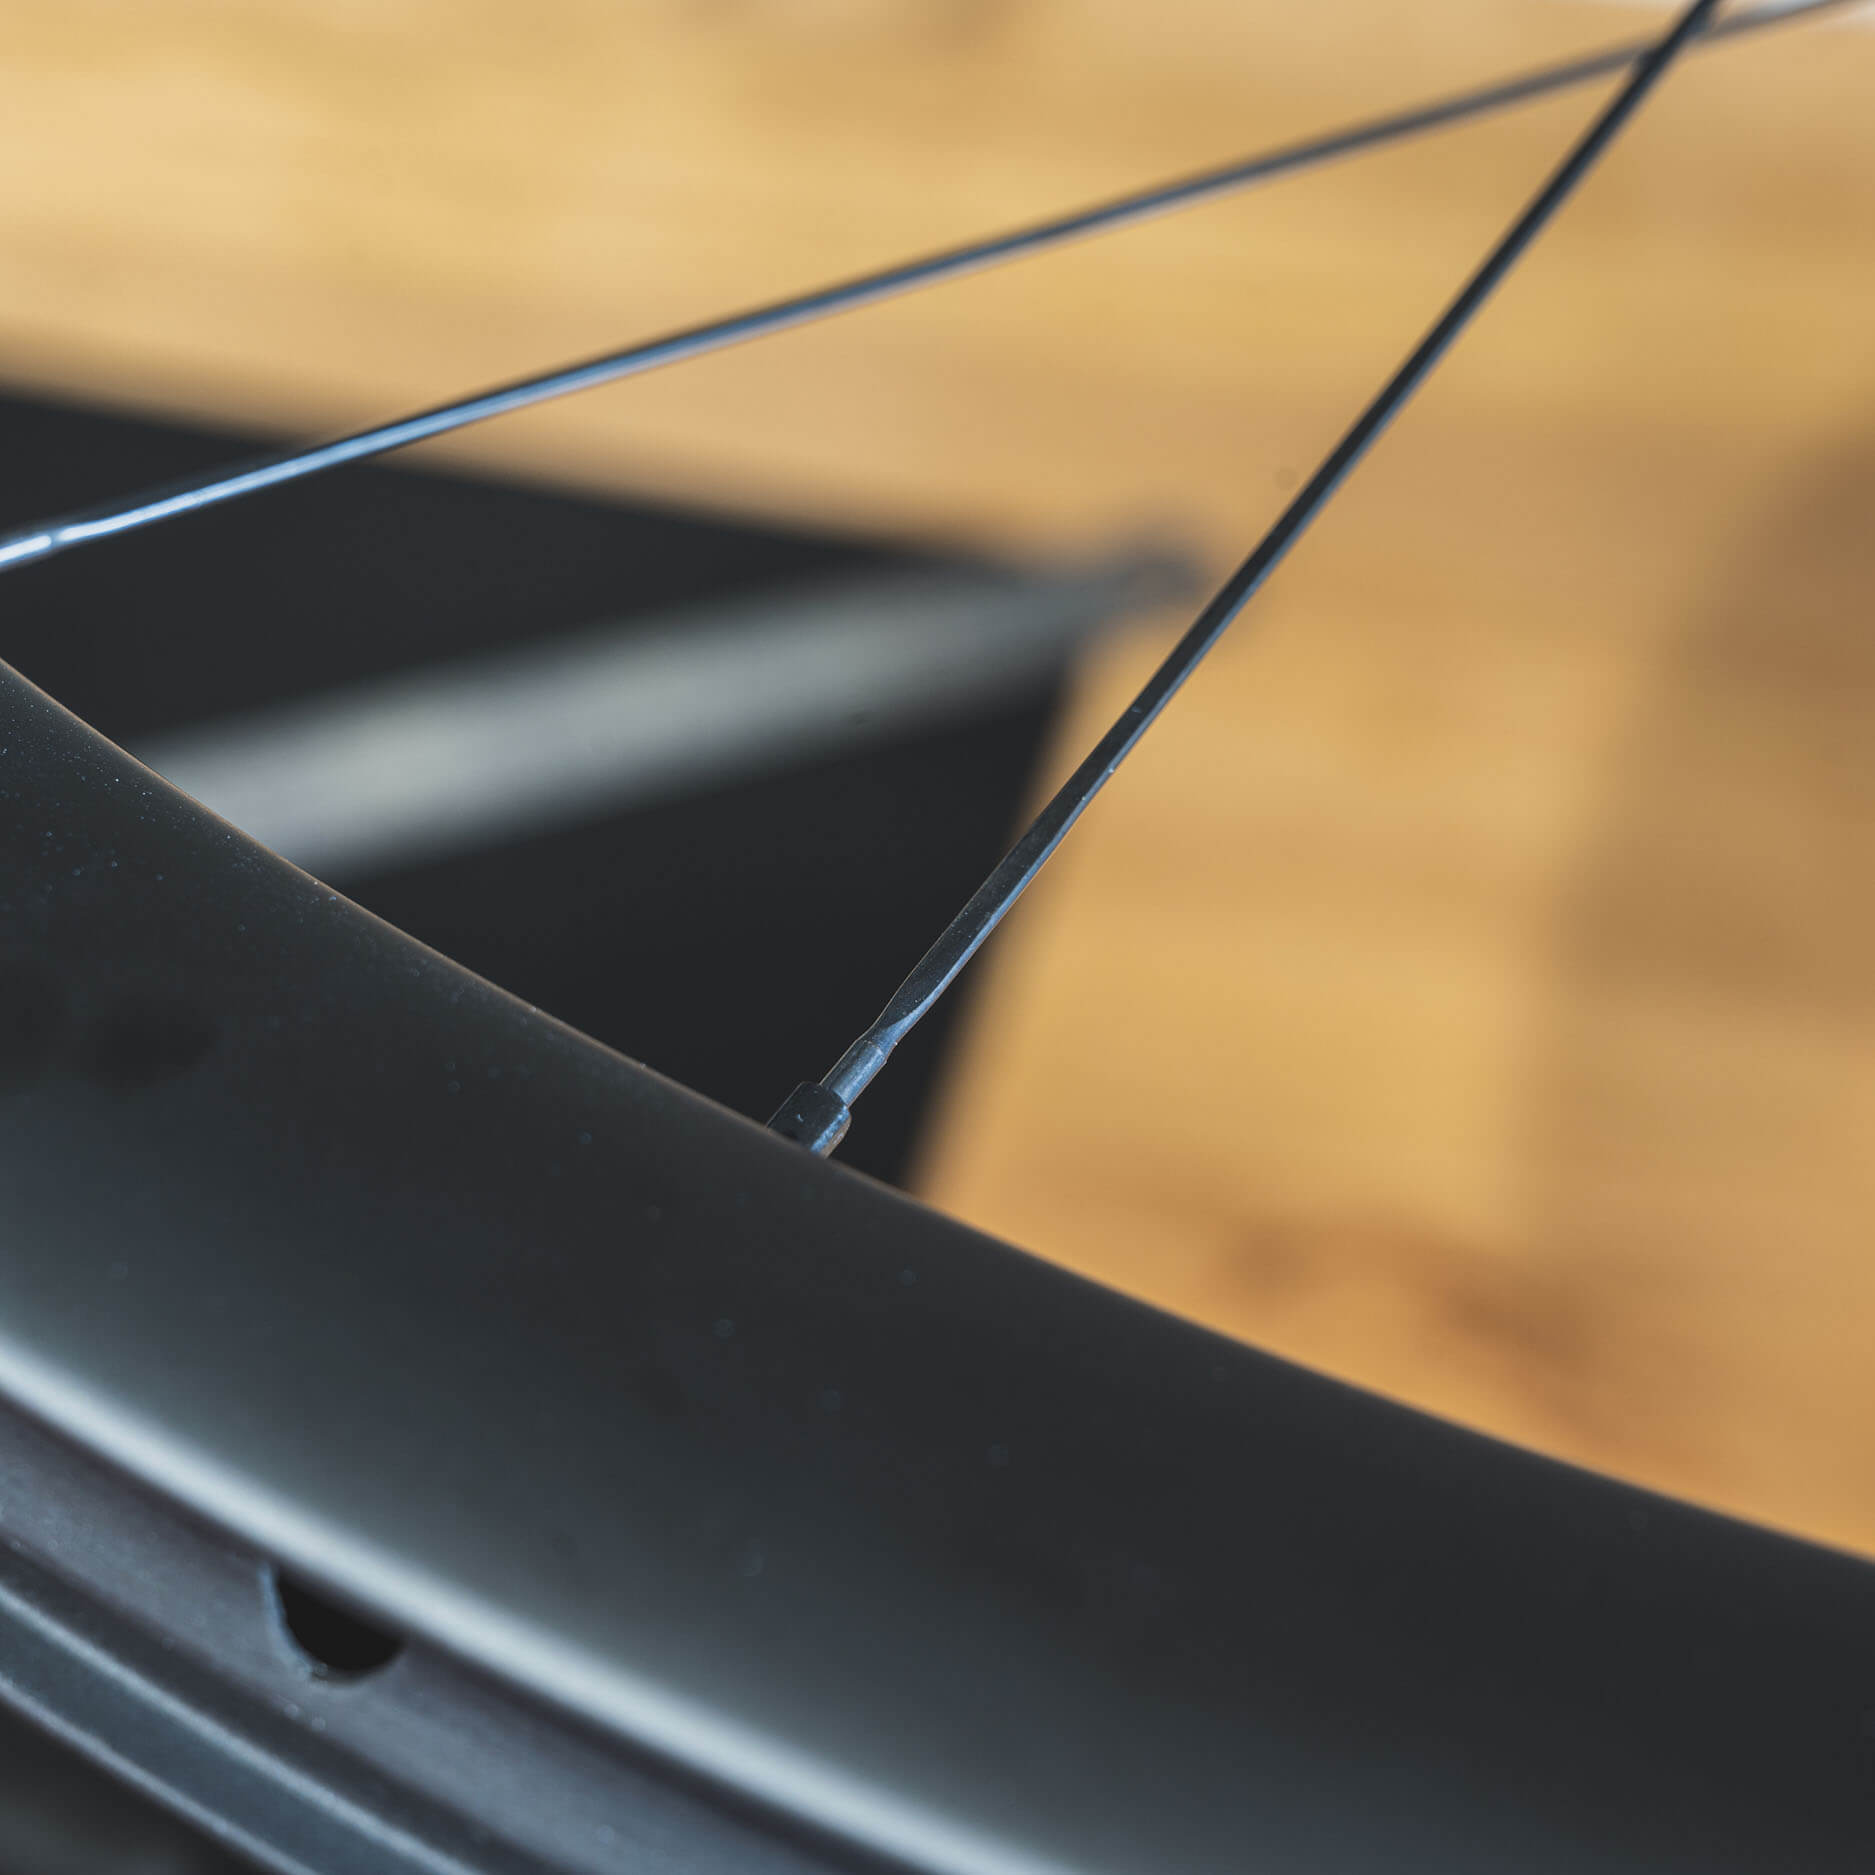
Asymmetric rims are nothing new, but yet they’re often overlooked. You’ll often see them in MTB or gravel setups, but on road builds they remain less common, possibly for aesthetic reasons. In this build, however, they were a quiet hero.
By shifting the spoke holes laterally (in this build, 2.5 mm offset), the rim essentially helps the wheelbuilder cheat the geometry a little. The result, bringing better balance to spoke tension across both sides. You have probably encountered the following phenomenon. On a traditional rim, the rear wheel would’ve suffered from a significant tension imbalance, looking at the non-drive side.
But here, the offset acted like a virtual shift of a left hub flange thus changing my effective flange to center dimensions and raising NDS spoke tension by over 10 kgF. That’s no small gain! Hence I considered it crucial, especially when dealing with flexible, superlight spokes like the Hyperlite Aero.
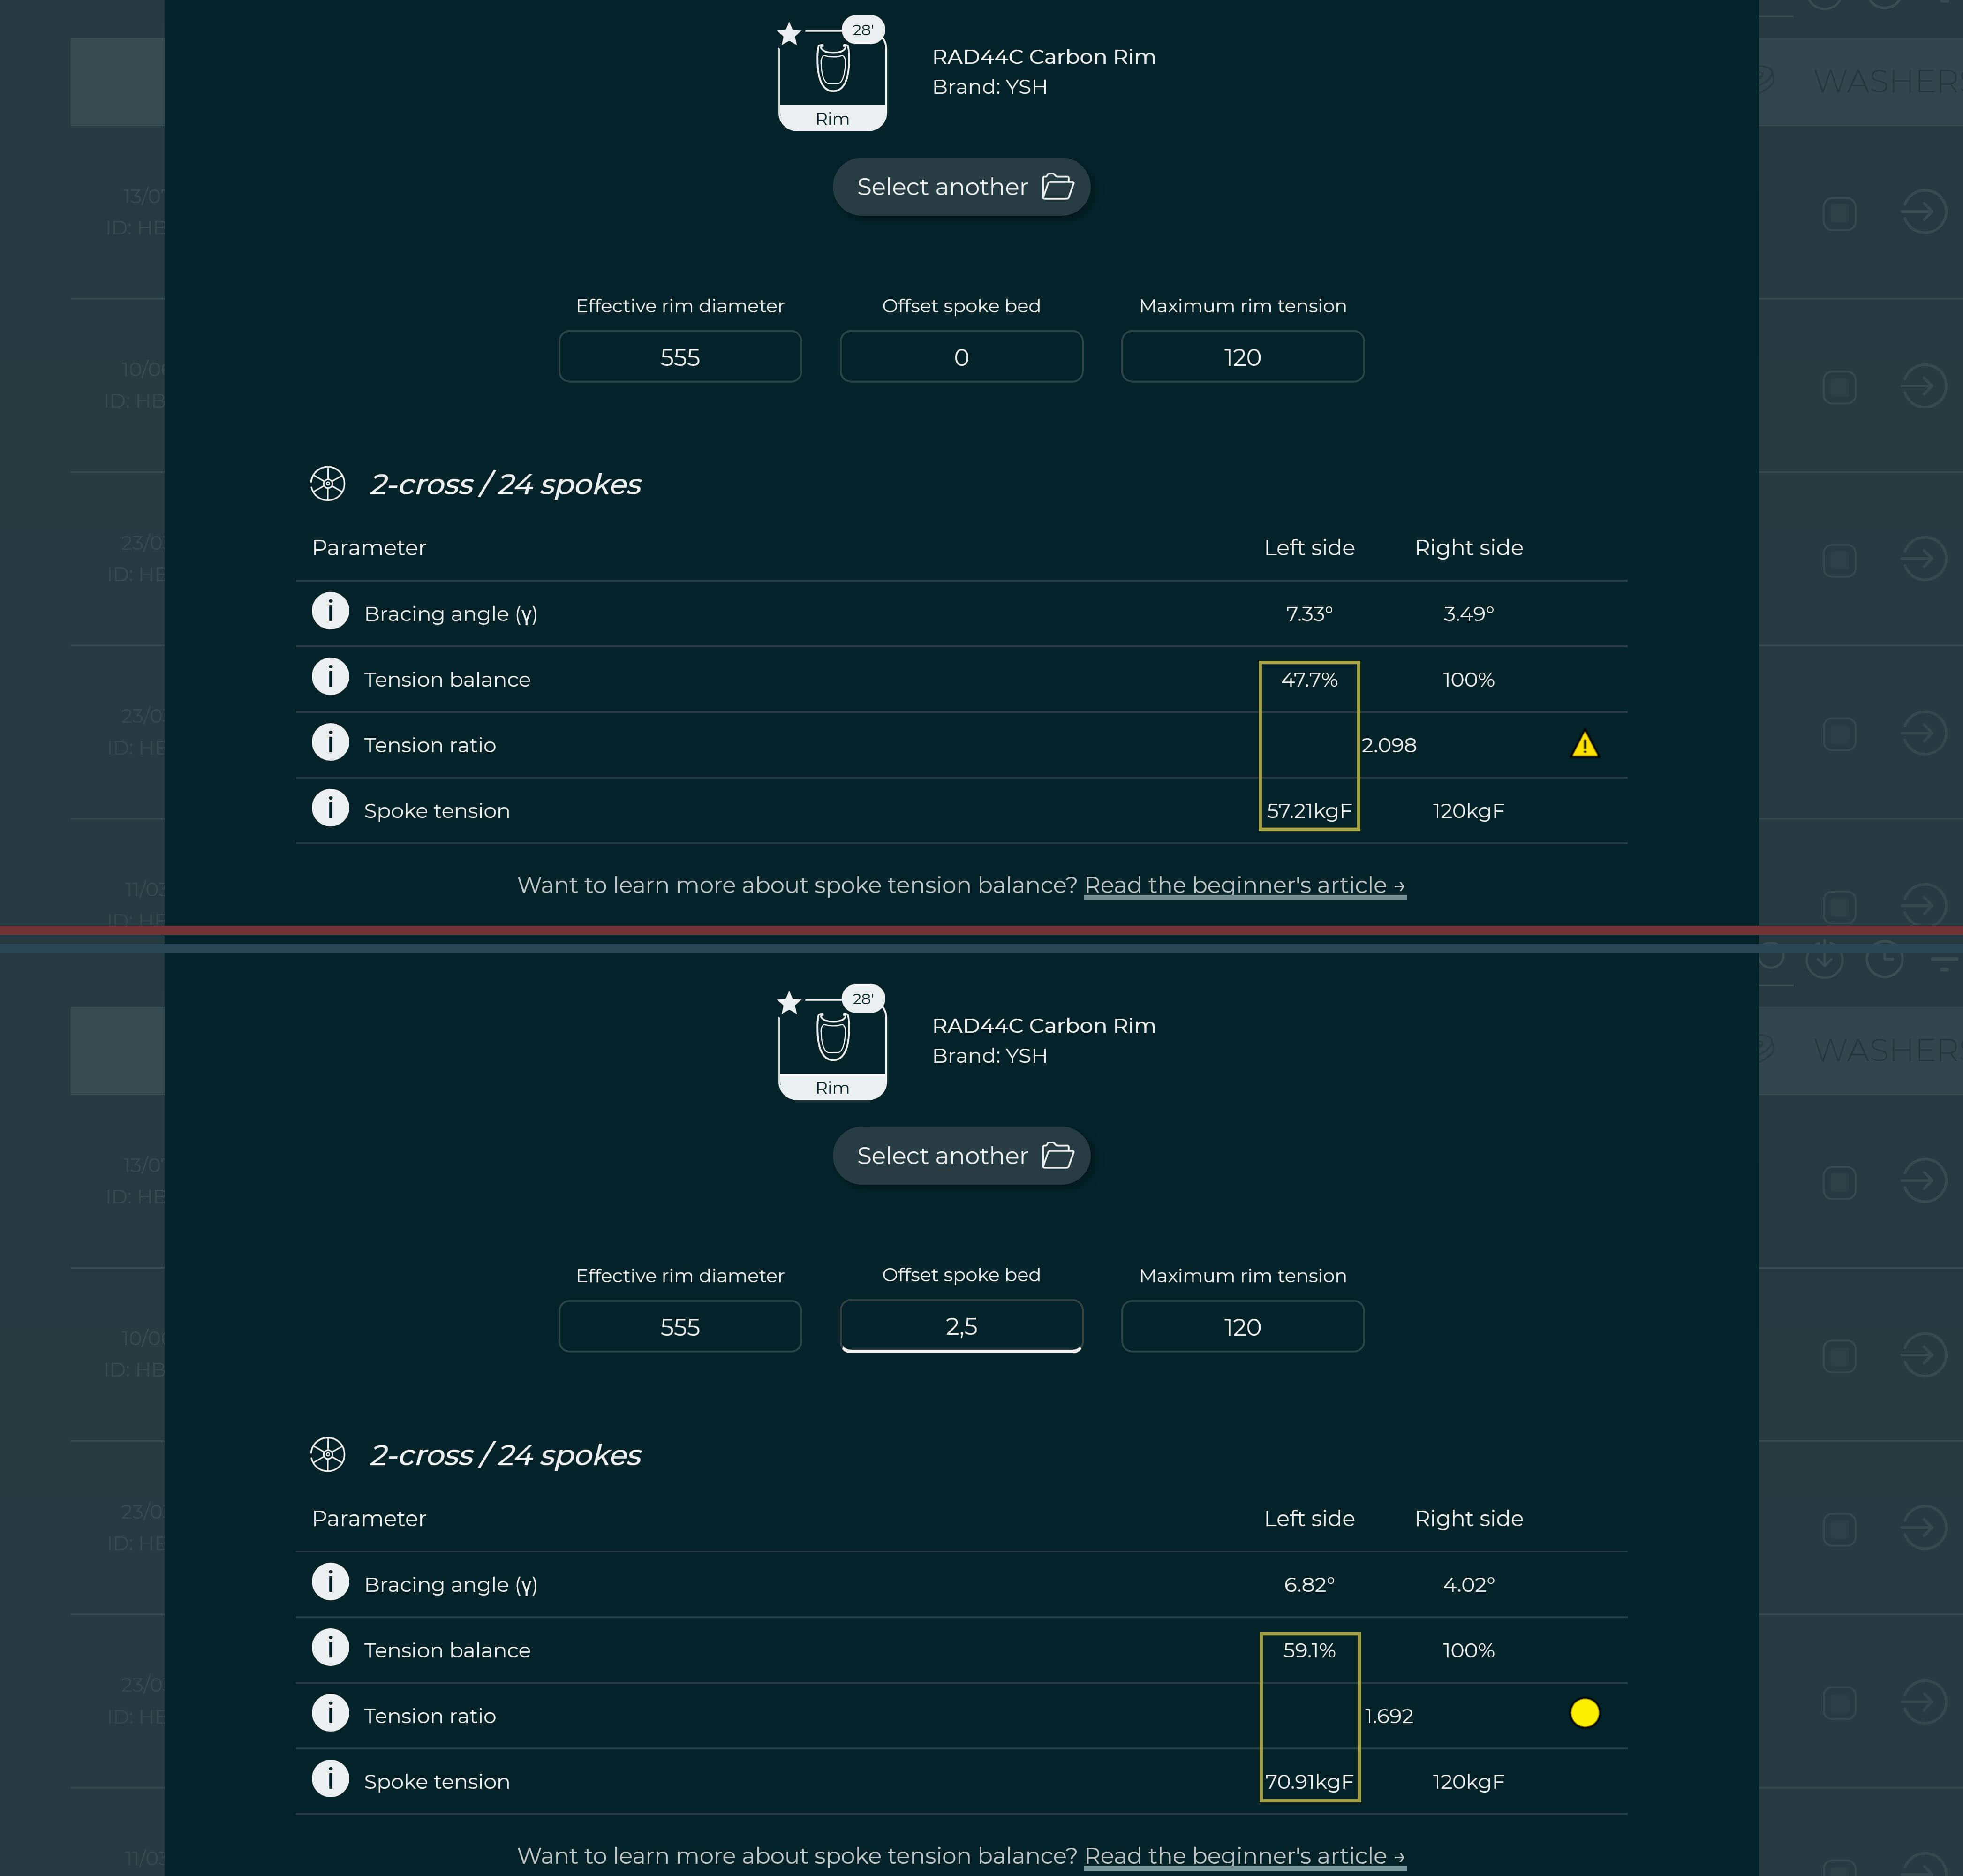
Just take a look at the screenshot above. The effects were significant and immediate: higher NDS tension, reduced dish-induced flex, and a more even lateral load distribution across the wheel. That’s more than just a technical advantage. It also gave me confidence that this lightweight system could hold up under serious riding forces.
Ironically, being so used to standard rim architecture (read: no asymmetry), I caught myself halfway through the rear wheel build with a noticeable off-dish to the right. Simply because I instinctively avoided to put left-side under too much tension, as I always do early on.
New App Feature: Tension Guide
This build gave me the perfect excuse to test the recently released app feature — the Quick Tension Guide — in a real-world scenario.
While spoke balance, distribution, and actual tension values were already calculated inside the main Spoke Calculator, this lightweight widget makes it easier to test saved components on the go. You can quickly change hub, rim, or lacing options and instantly observe how they affect predicted left/right tension balance.
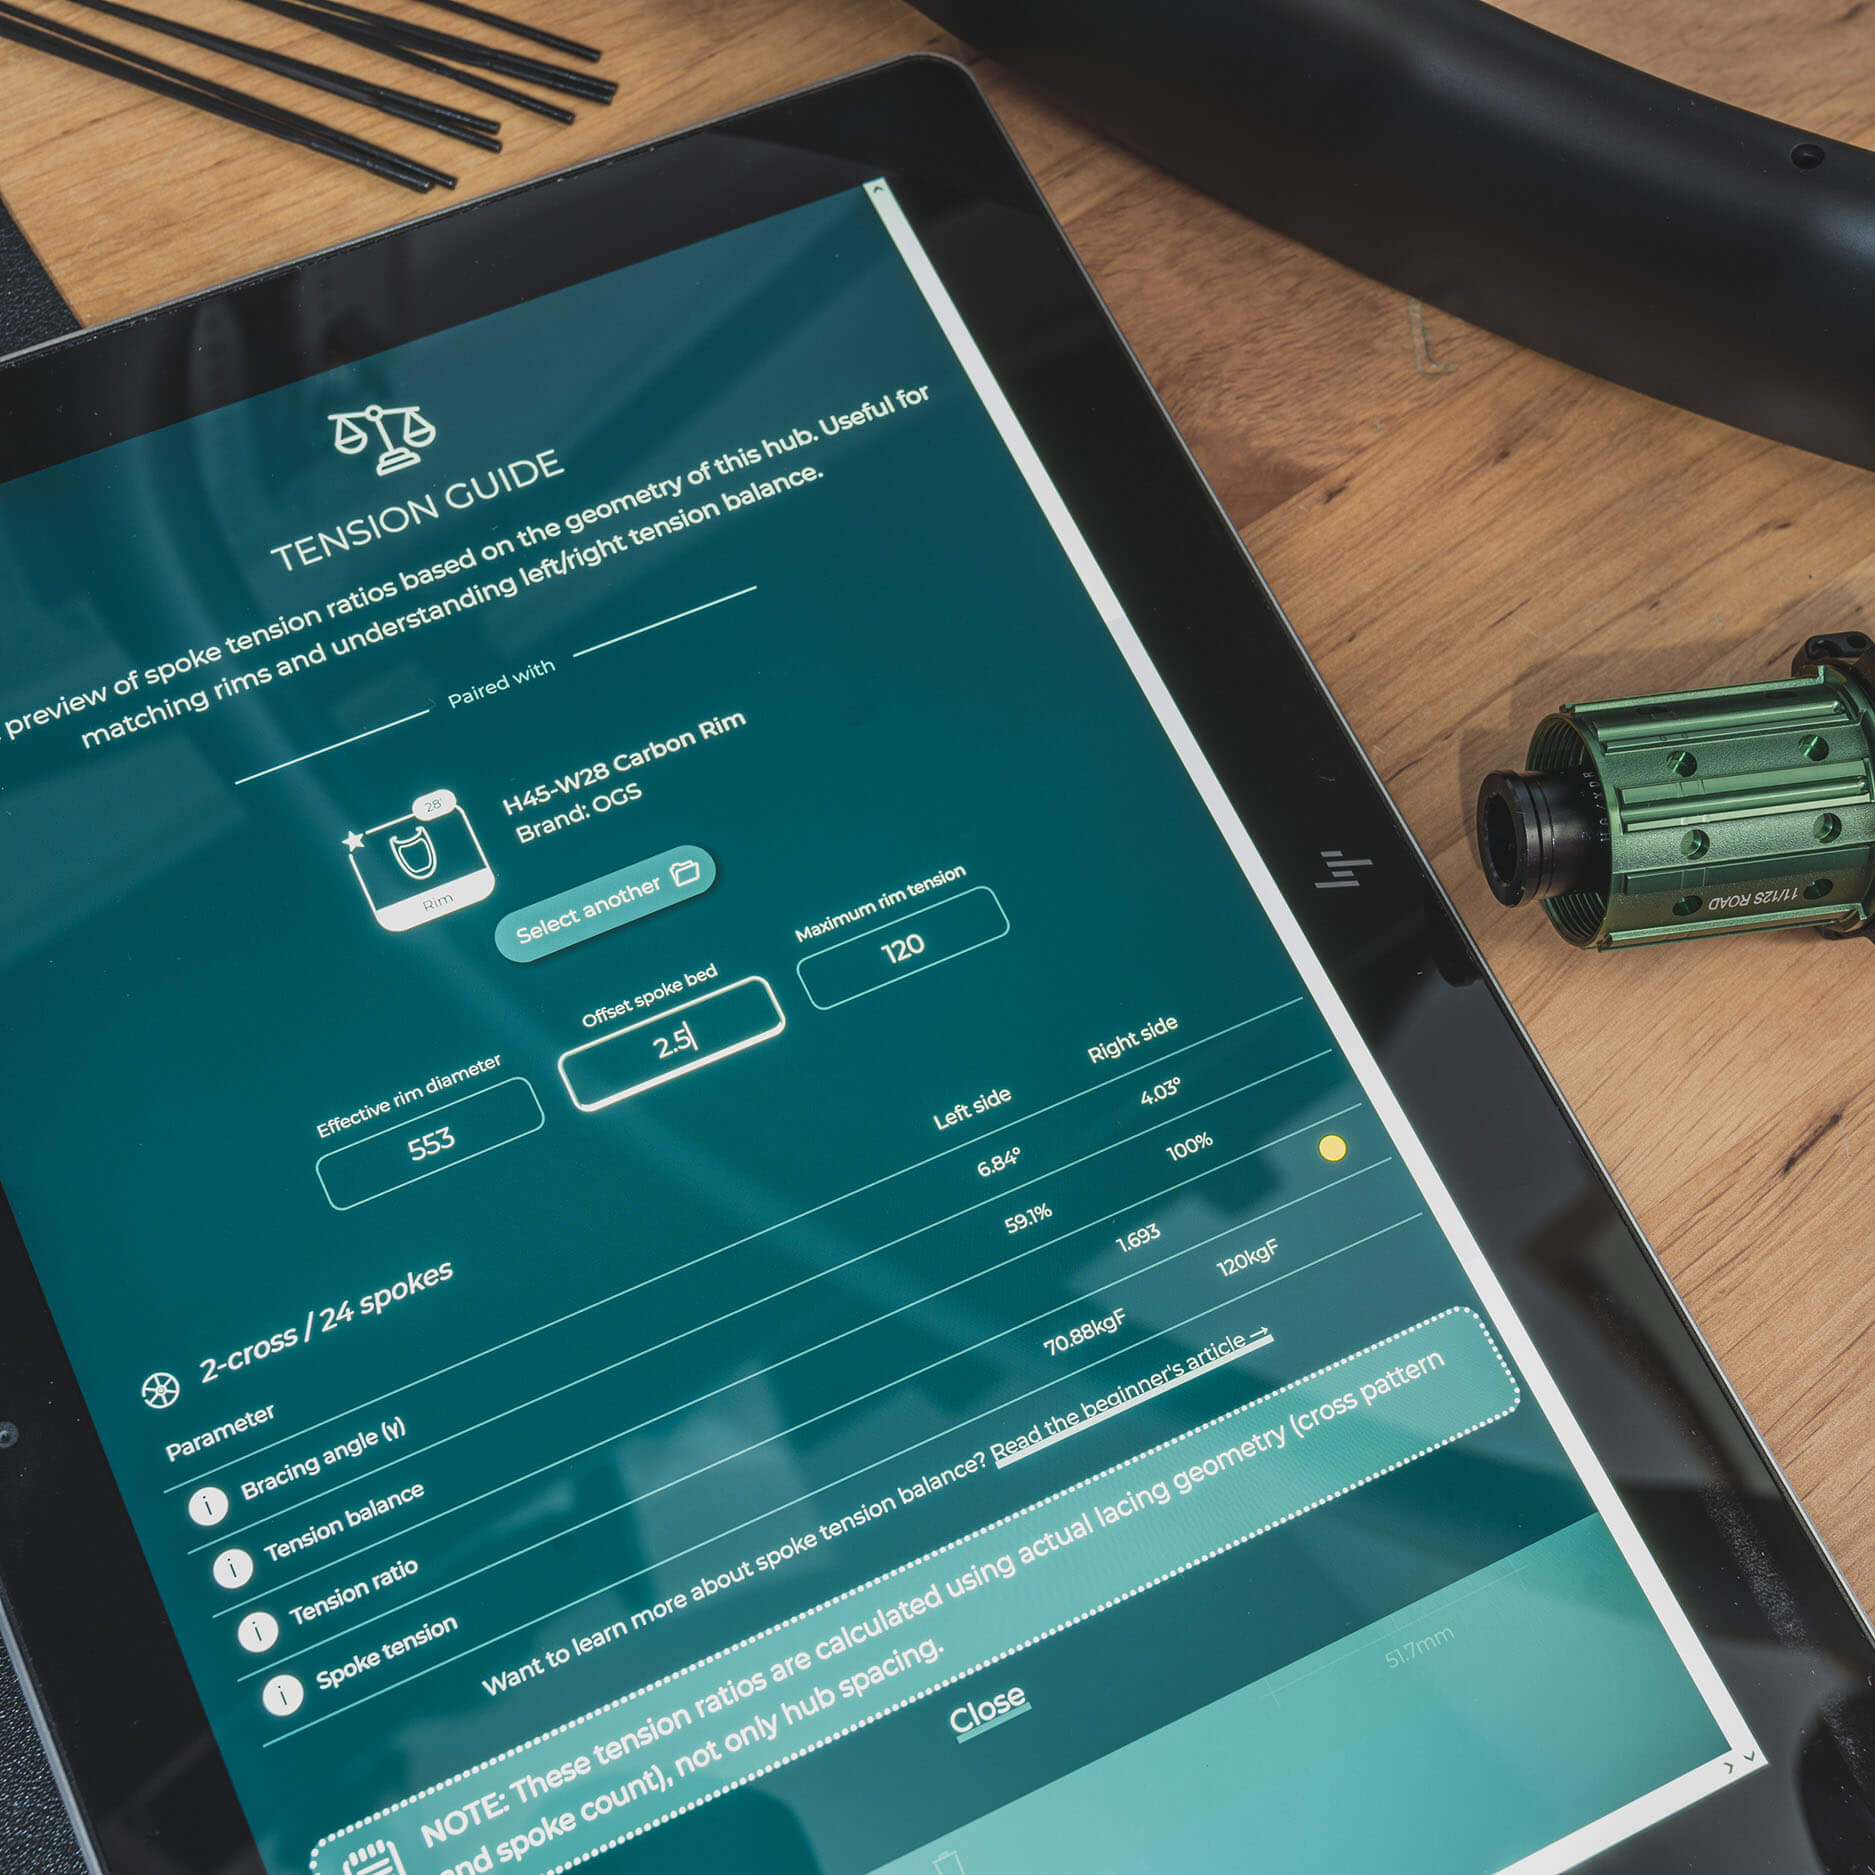
In its essence, it mathematically estimates left/right side tension targets based on geometry. Think of it as setting the structural foundation before selecting components or fine-tuning spoke tension.
Personally, I find this feature essential for any wheel builder wishing to better understand the underlying forces in a wheel. It helps avoid under- or over-tensioning, and gives you clarity early in the planning phase.

That was exactly the case here. Thanks to the Tension Guide widget, I could see from the outset that the asymmetric rear rim would push NDS tension few percents higher. Just enough to confidently run Hyperlite spokes without compromising rigidity or long-term stability.
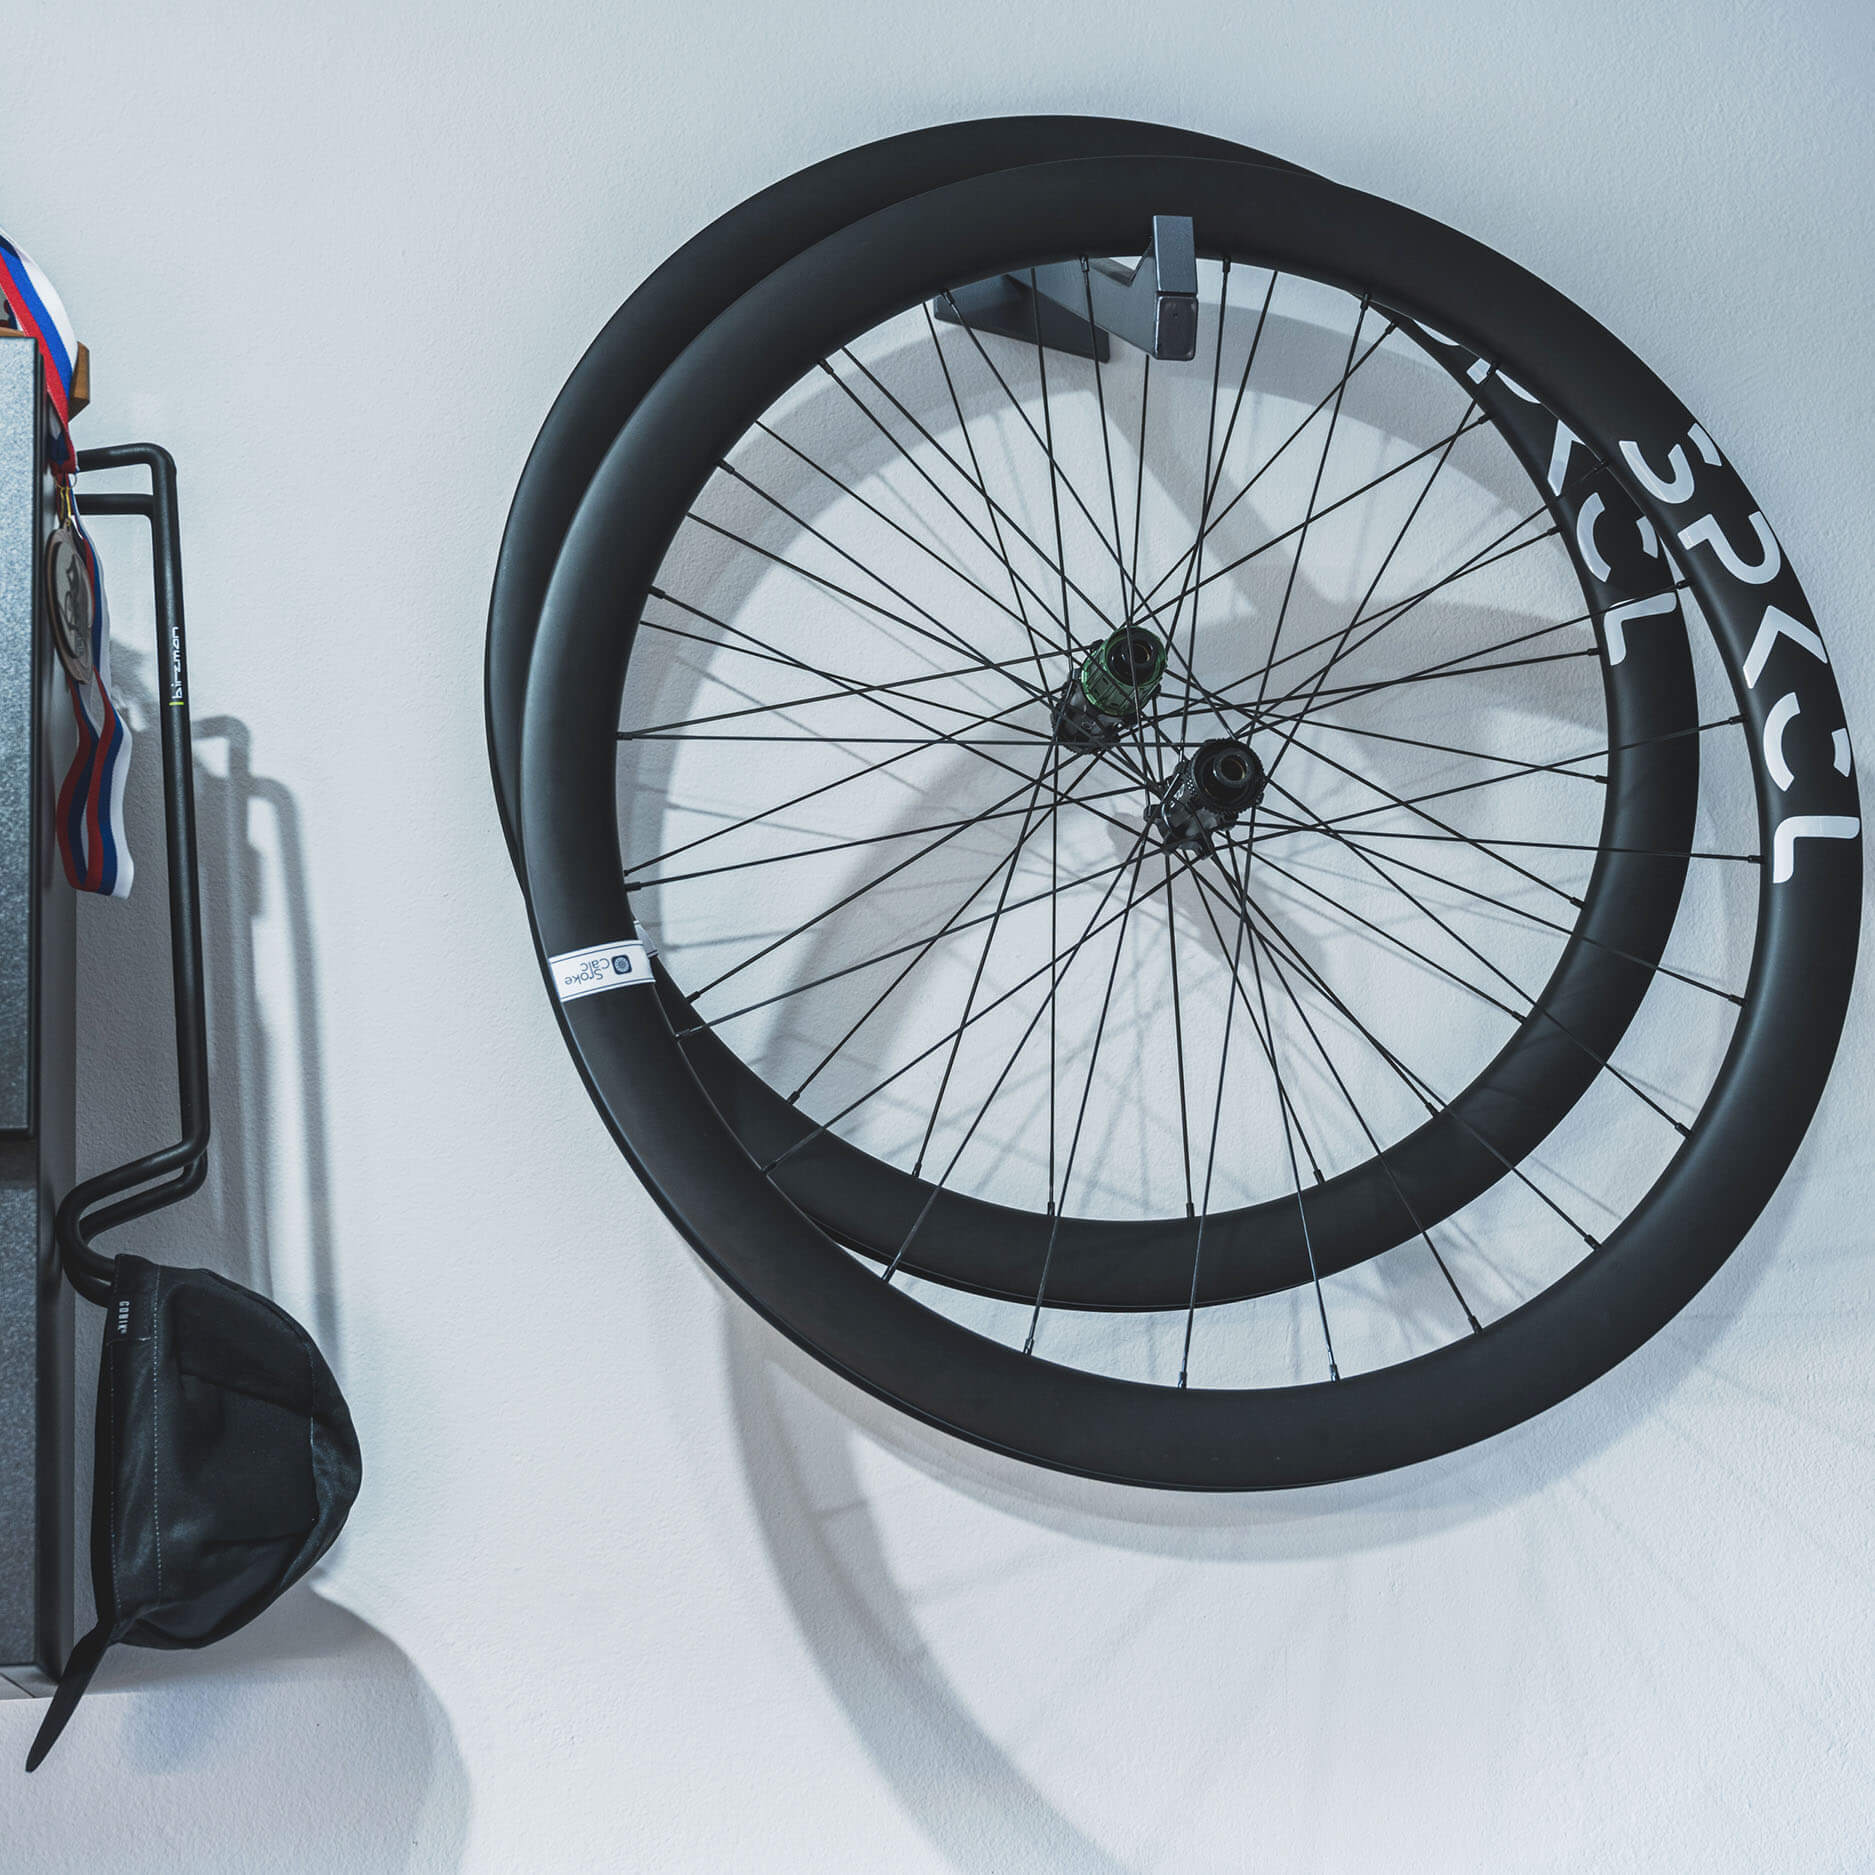
THE RESULT
Below is a visual look at how the project came together. And tipping the scale at just 1230g, this is a truly featherweight wheel build using traditional stainless steel spokes.
FINAL THOUGHTS
This was by no means an off-the-shelf build. It started with a thought-out process which set strong base for the execution. The Alpina Hyperlite Aeros met expectations, both in feel and finish. The new app tool boosted confidence by creating clarity before a single spoke was laced, and the asymmetric rims quietly brought the whole system into balance.
Lightweight builds are always fun, but can be tricky as well. Honestly, going light isn’t just about picking the lightest parts you can find. If you care about strength, ride quality, and longevity, you need to think beyond grams. Building a true performance wheelset means understanding the structural relationships defined by your component choices — flange geometry, rim offset, lacing pattern, and spoke selection.
Sure, there are material-specific quirks to keep in mind, like avoiding deflection and torsion, and approaching tensioning gradually and deliberately. But these are manageable considerations rather than major limitations. Once you get the feel, the build flows naturally.
If you're exploring similar setups, give the Tension Guide a try. It helps you plan smarter, avoid guesswork, and improve balance to your builds.
Enjoyed this article?
Buy me a coffee to support my work!
Every coffee helps fuel more content like this!
About author

Aljaž Trenta
Author and founder"As a cycling enthusiast, bike mechanic and self-taught web designer, combining several of my passions and skills to build SpokeCalc was a great fun for me."